Grackle & Sun

Archive for the tag “knitting”

The Natural Order of Chaos

I can’t remember exactly when I started collecting yarn for the beast. Around 2006, I think. Ten years ago. A friend loaned me her copy of Cheryl Oberle’s Folk Shawls after she knit a few gorgeous shawls from it.  I thumbed through the book, drooling at the beautiful, complicated stitches and delicious+scrummy yarn. And I kept on thumbing through.

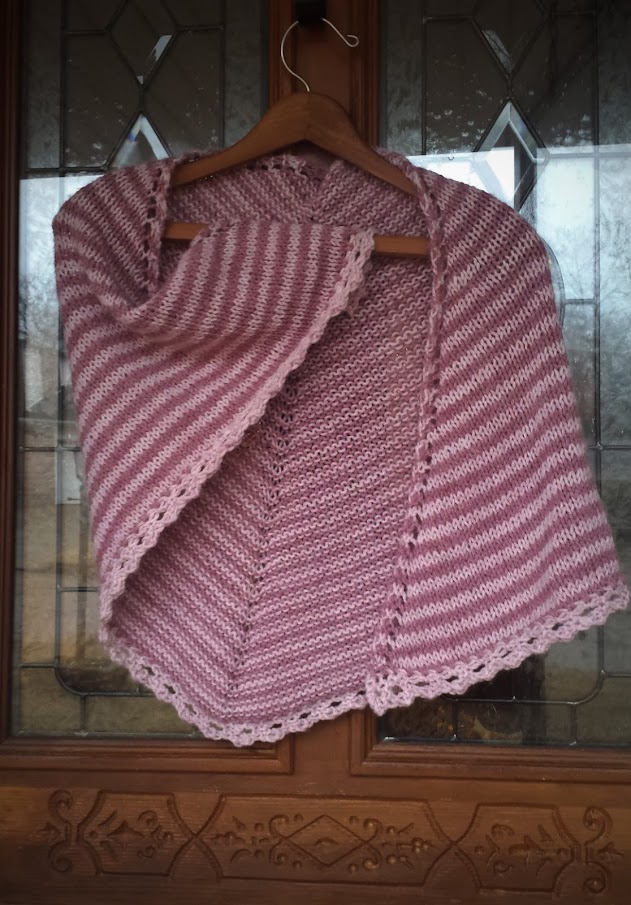
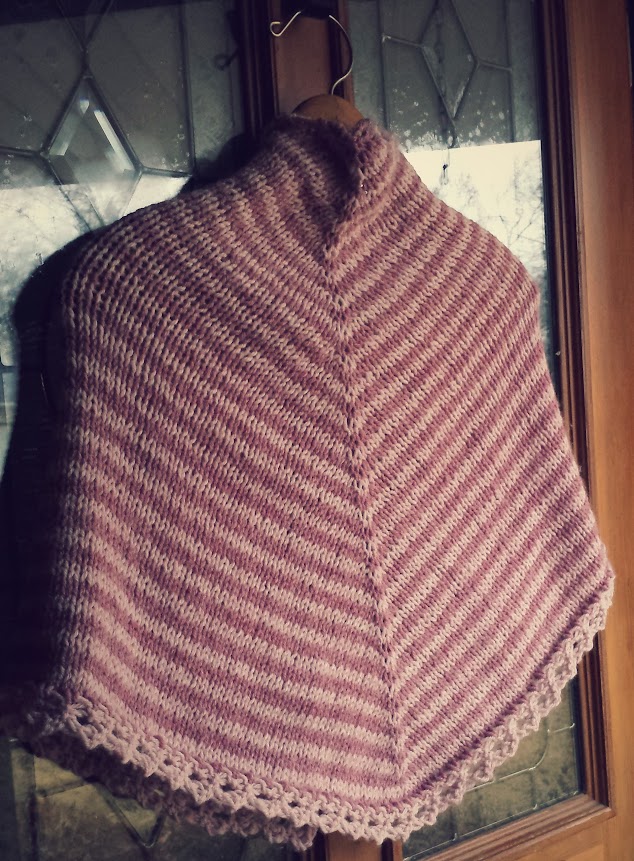
As a newish knitter, I chose patterns based solely on what I thought I was capable of doing, not on what truly called to me. I was afraid to take off my training wheels. And so I chose the one pattern that I thought I could actually do–the ruana: a large rectangle knit entirely of the simplest stitch a knitter can make with two hands. With the exception of the cleverly constructed  neck (which was knit last, giving me time to build up to it), this is what we call a ‘mindless knit’.  That is not said pejoratively.  A mindless knit is a good thing–something that can be done without counting rows or stitches; something that can be picked up and put down without fear of jacking it up. In many ways, for many knitters, it is the perfect kind of knit–one that allows the stresses of the day to fall away in the rhythmic click-click of the needles, the pull and release of yarn across fingers.  But in this moment, I was not thinking of those things. I was only thinking of what I could- and mostly of what I could not-do.  Thus, this was a project born out of fear and denial: the unfortunate (and unnecessary) fear of crafting over my head, and the utter denial of my heart’s desire to do more. I was stubbornly unwilling to leave the bosom of my beloved garter stitch. And so I cast on (and cast on and cast on), and began a four year journey of…ruana2What? Fortitude, mostly. It’s a lot of garter stitch. 280 stitches per row. 472 rows. That’s 132,160 stitches just on the body. Add maybe another thousand or so for the neck. At times, it felt like a million more than that. It was the neverending story. But as far as stories go, it was a lovely one to listen to and to create. Warm, soft, lustrous, and colourful. It was these qualities that kept me coming back to the knitting. It was so enjoyable. I stopped seeing garter stitch as ‘basic’, and started to experience it for what it truly is–foundational. And the ruana, safe and constant, gave me space to think.

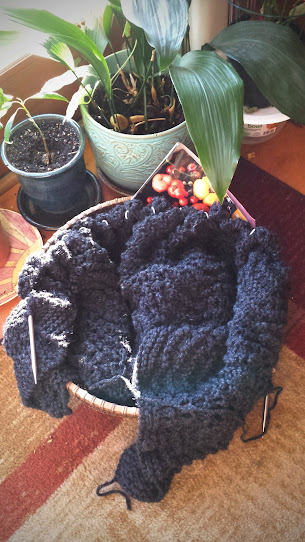
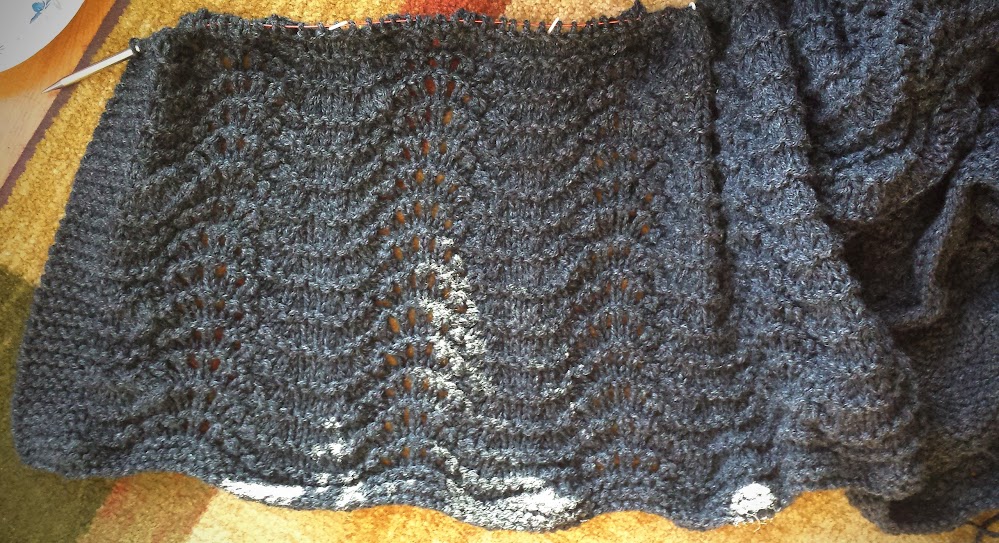
In this thinking, I figured out why I had actually chosen this project. Stitch by stitch, I began to examine my fear, which I realized was born out of belief in an identity of noncraftiness–which itself was all tangled up with life-long rejection from others for not being girlie enough. As I sat with that fear (and also that rejection), stitch by stitch, I realized that I was capable of doing this crafty thing that I loved in my own non-traditional, not-super-girlie way.  And so as my hands knit the ruana, my mind tinked the old identity, the old judgement, until it could be reconstructed into something true. Some of this was very conscious. Some of this was very subconscious. But I knit and knit and knit through it. Somewhere in there, I started working on new projects. Complicated projects which required new skills. I leveled up a few times. But I came back to the ruana. To peace, and space, and the story she told. ruana1And like the best stories, the ones that are unhurried, that take time to pause and call attention as they turn and unfold and build, the ruana demanded patience and rewarded with depth. Demanded reflection and rewarded with insight. She holds a story. Each stitch a word, each row a phrase flowing into the next; the wool providing both characters and setting, my hands the action. My own story knit into it whole cloth.

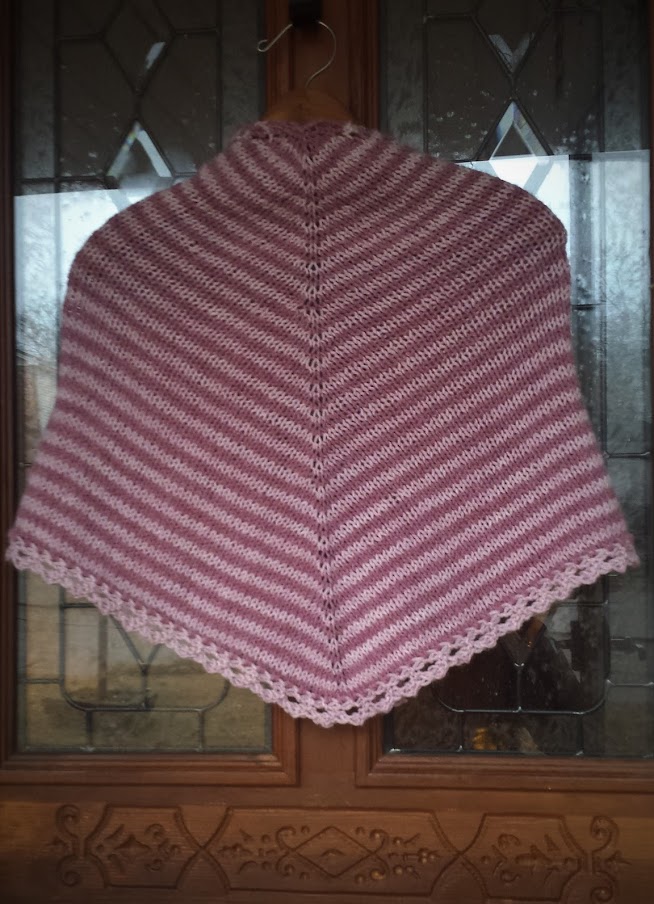
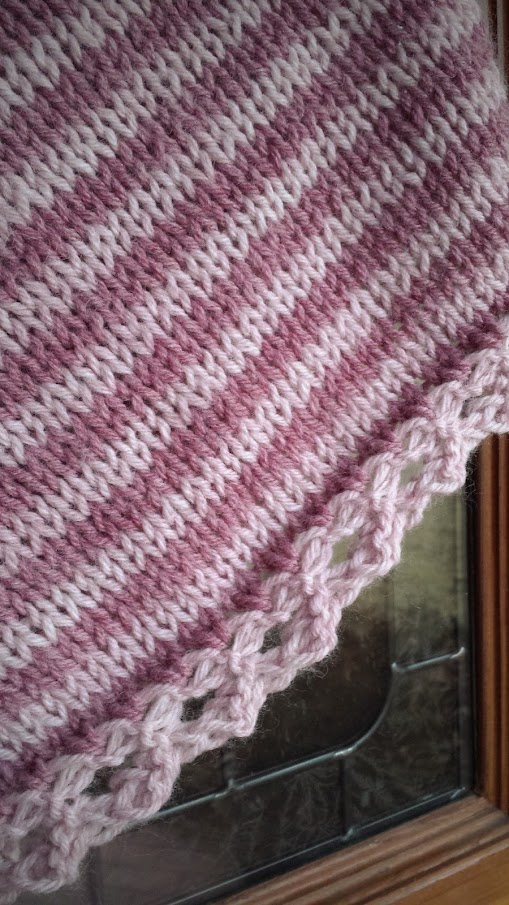
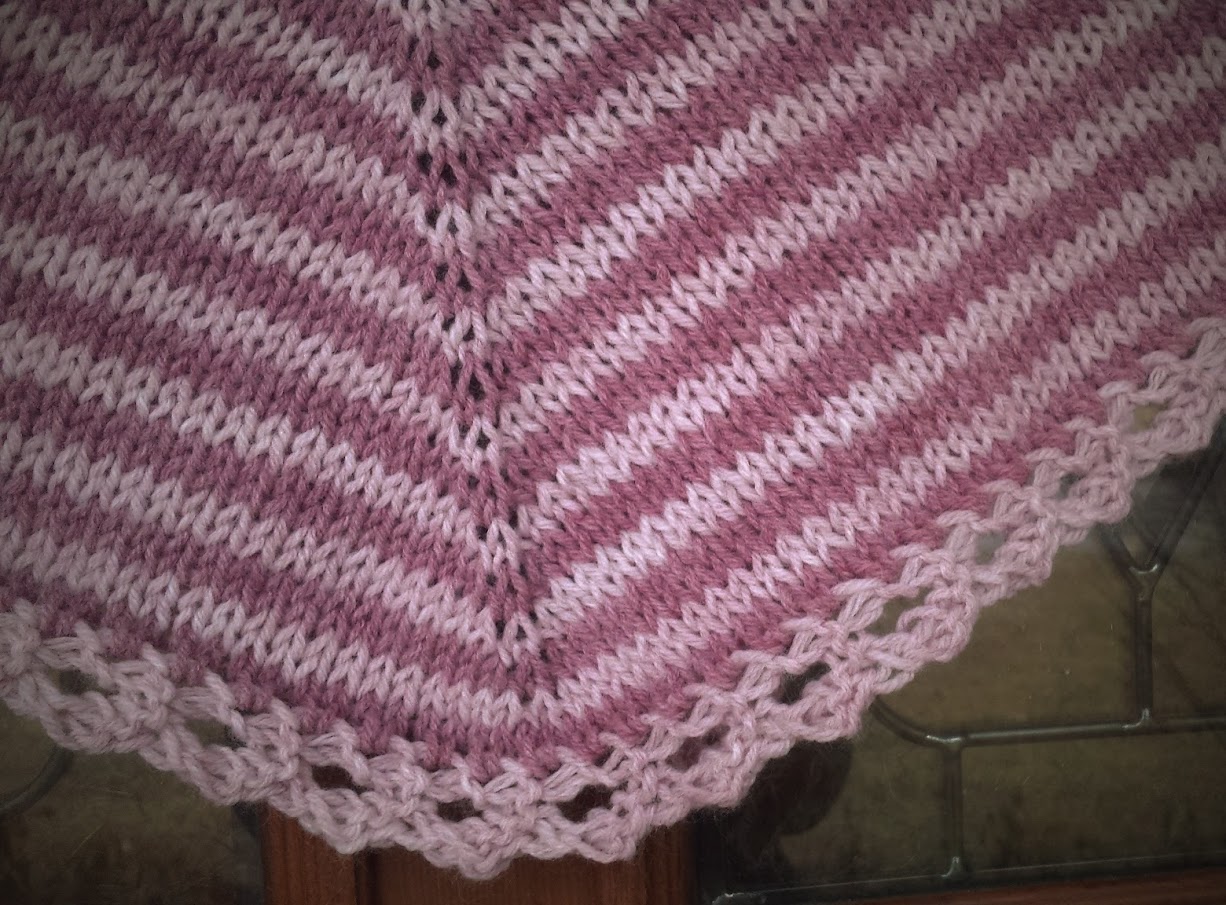
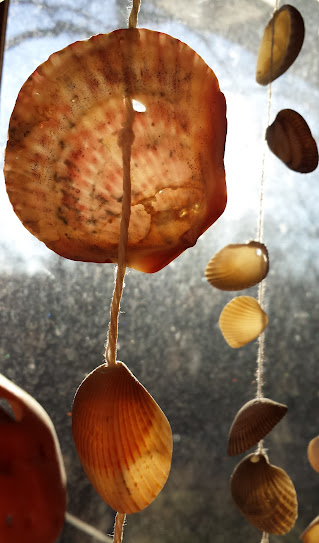
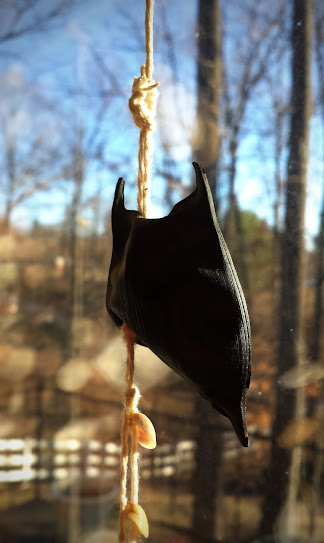
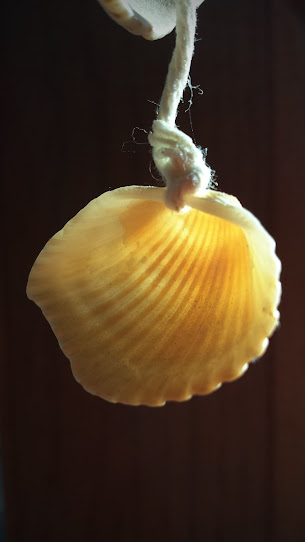
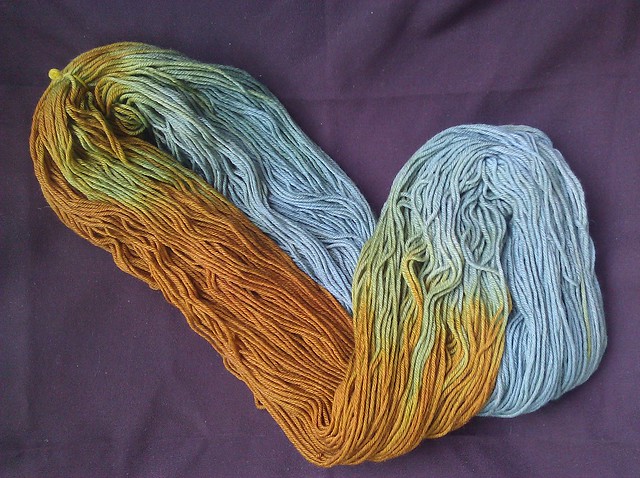
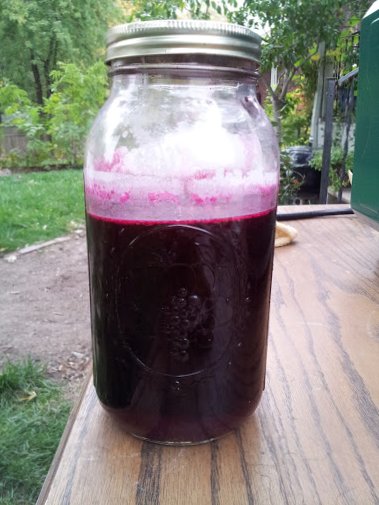
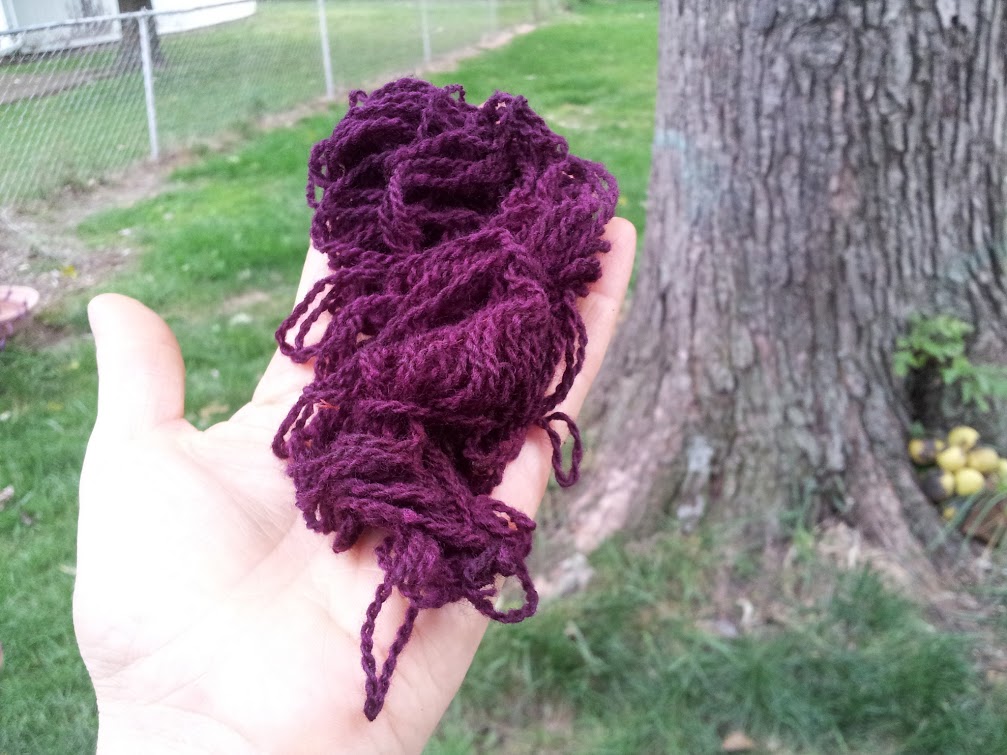
Then she was finished. And I sewed shells and bells onto her fringe, so she can sing her story, too.bellsandshellsOne of the joys of this project was playing with so many different, glorious skeins of yarn. I loved choosing at random (which is never really random) and seeing how each colour blended into the next. Each skein had its own personality, and I’ll say this: you have to listen to your yarn. It will tell you who it wants to sit next to, if it wants to stand out or blend in.

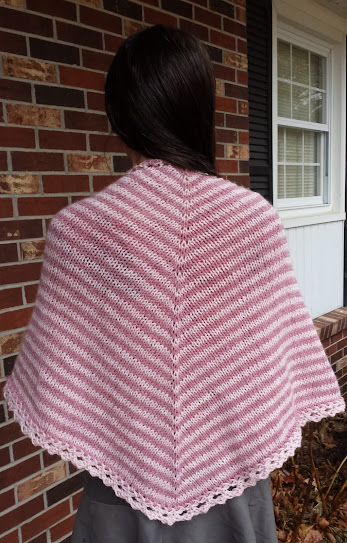
I used eight different colours and slightly varying weights. I have them listed with pictures on my Ravelry project page. It is a near indescribable pleasure to work with fantastic yarn. I prefer stuff with character–natural colours, handspun, and natural fibers. And I don’t mind picking out the odd piece of straw here or there. The difference comes down to working with something alive or something dead. That’s what it feels like to me. Here’s what is in the ruana of truth:

  1. Beaveslide Dry Goods is an old favorite. Great yarn, super nice people. And the colour cards are awesome. I love them. I used Fisherman’s weight 3 ply in Bison Brown.
  2. Reynolds Lopi 100% Icelandic wool, all natural colours (grey-brown-black). This has been discontinued now. It’s a heavy yarn, and I split the plies to use the singles.
  3. Galler Peruvian Tweed in brown-black #107. Super ridiculously soft undyed superfine high Andes alpaca. Need I say more? Nope.
  4. Deborah Arbuckle’s Shadyside Farm Studio  Hands-down my favorite yarn ever. Romney wool. Lustrous. Gorgeous natural colours. And she is super awesome. I used Sheep Heather in dark chocolate and black. Deborah’s Etsy shop is empty at the moment, and I hope she’s just taking a break to restock. This is me sitting here not freaking out.
  5. Brooks Farm Yarn I swear angelic light shone from this booth at Stitches Midwest. Their yarn is so soft and so shiny. Elegant, but still durable. Like an elf of Rivendell. I used two different colours from a line called Harmony–a blend of silk, wool, mohair, and magic. It has been discontinued, but it’s stashed on Ravelry with some for trade/sell. Hint, hint.
  6. Cheryl Oberle Dancing Colours. I met Cheryl Oberle at Stitches Midwest in Chicago and told her I was knitting her ruana pattern. She was absolutely lovely, and she picked out a skein from her Dancing Colors line to go in the ruana. How cool is that?! Super cool, that’s how cool. Highlight of the trip.

My non-knitting friends get a real kick out of my yarnie fangirling. Like the time we were sitting around the table at a dinner party, telling our best celebrity stories, and I regaled them with the time I waited on Casey and Jessica Forbes at a wedding brunch. You know? Casey and Jess… the founders of Ravelry. Oh, come on! Ravelry. The knitting website… Blank stares and then drinks shooting out of noses, people. That is the entertainment I bring to the table.

Not all knitting carries a story of chaos and transformation and changing of masks the way the ruana does. But it can. Everything has a story, and anything can be a catalyst for change if that is how you choose to see it. And that is magical. People always think that magic is supposed to change the outer world. It does. By changing you, by changing the inner world. May all your crafting be magical.  ruana3

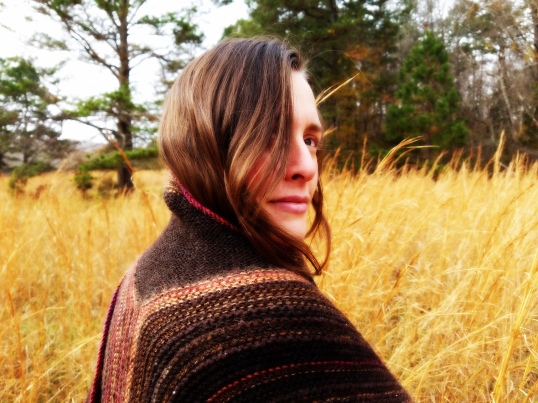
As always, tinks on me!

Knit|tinK: Sweet Little Shawl

All that ranting and moaning about not being able to knit apparently unblocked my mojo. I decided the next day that I needed to cast on a quick little project for a gift I had promised a friend months ago. I found the perfect pattern in Susan Galbraith’s Sumptuous Stripes Shawlette.

The shawl is a gift for a teenage girl, and so I decided that making it easy to wash would be the kind thing to do. I used two skeins of my go-to favourite “I’m making this for a kid” yarn, which is Lion Brand Wool-Ease in worsted weight heathered solids. We all have our guilty knitting pleasures, and Wool-Ease is mine. It wears well, and you can chuck it into the washer and dryer many, many, many times, and it comes out looking like new. The natural-coloured Romney wool snob in me is stamping her foot in the corner. I am ignoring her.

This took all of two days to finish. I had fun learning how to knit on an edging, which somehow I had never done before. Susan was super helpful in answering my questions when I couldn’t quite visualize where I was in space and time. It all came together without a hitch. Well, almost. The Universe had a hand in this project, of course. See, the funny part about the whole thing is that in order to get the drape I was looking for, I had to go up in needles size. To size 11. So, two projects going on size 11s at the same time. Ha! That’s what I get for bitching.

The only other size 11 needles I had in the house were a pair of old aluminum straights. Not even all that straight–one has a bend in it either from use or maybe from being sat on… I was NOT going to buy another pair of circs in a size I abhor, and so I used the straights. I crammed all 199 stitches onto those cold, chubby, metal sticks, and I made it happen.

Turned out pretty cute.  Thanks to awesome teenage daughter who modeled for my “knit cred”.

I have a thing for knitting stripes. In part, it is due to my “stripe amnesia”–that’s what it’s called when you forget how horrible it is to weave in a millionty ends. BUT, this pattern had no end weaving whatsoever due to the very clever, yet simple, way the colours are carried and changed. I also love the way the edging took care of binding off the live stitches and helped the stockinette to lay down nice and flat. Lovely. Especially since the downfall of Wool-Ease is its lack of blockability.

There we go. Knitting success. Mojo unblocked. Needles flying like the wind.

Aaaaaand… I’m back to the afghan. :D

As always, tinks on me.

Knit|tinK: Squirrels

It’s been a minute since I posted a knitting project. This is true for one incredibly simple reason. I’m knitting an afghan.

It was supposed to be a wedding gift. Ha! I thumb my nose at deadlines. But if I’m very, very lucky, it can be an anniversary gift instead. I’m so not even joking. I’ve been knitting this thing since June, and I’m only, like, 8 inches into it. And that’s on size 11s! Knitting with size 11 needles is like coloring with chubby crayons. It’s like building with Duplo blocks instead of Lego.The whole process is all ham-fisted and unwieldy and weird. My one salvation is the sweet, sweet comfort of feather + fan.  Blessed be the four row repeat.

This kind of knitting is mindless. Is boring. Is the kind of knitting that requires discipline, self control, and the ability to stay the course. To not get distracted. Did you see the seed catalog peeking out from the basket? That is not helping. I sat down to knit the other night and instead wrote up my entire seed order. I try to knit on this monster beast and suddenly I’ve got the brain capacity of a rabid squirrel on a merry-go-round. Today, I did the dishes instead of knitting. I vacuumed.

I’M WRITING A BLOG POST ABOUT KNITTING THE AFGHAN INSTEAD OF KNITTING THE AFGHAN.

What is the problem? I don’t know. Usually knitting time is a gift. But for some reason, right now I just can’t sit still that long. I am restless. I am weak. I am undisciplined. I am… Look, shells! These are shells I found on the beaches in Virginia, Maryland, and Delaware. Yes, Delaware actually does exist. I have been there and know it is true. I love the ocean. I am also afraid of it. And shells are pretty fantastic.

I love the devil’s purse. I wonder who first gave it that name? Did you know that these are the egg cases of sharks and skates? Some awesome little baby sea creature hatched out of this crazy collagen pod. Some mama sea creature MADE this crazy collagen pod with her body. How wild is that?

And all this sunlight saying everything is ok. Urging me to look, and then look again. To think of beauty and far off places. Of stories and adventures. Of possibilities.

Aaaaand… still no knitting. But I did get hungry what with all this cleaning and contemplation. So, I made myself a green smoothie. Can I just say that my smoothies, although quite delicious, never ever ever ever ever look like they do in health food magazines or celebrity cookbooks. My smoothies look like this.

Mmmmm, yum. Lol. Let’s be real here. That is one super healthy smoothie–burgeoning with ripe (albeit, frozen) cherries, masses of fresh kale, coconut oil, heaping tablespoons of omega-laden flax meal, super duper grain-free plant-based protein powder, and powerhouse antioxidant camu camu. It’s healthy, but it is not sexy. That is one fugly smoothie. I bring it up simply to point out that the good stuff rarely looks like it does in photos. And I think this derails a lot of people, keeps them from sticking to their good, healthy intentions. We get so hung up on the image that we lose sight of the content. It doesn’t look perfect so we messed up, right? What’s the point? Then we spend all our precious energy on trying to make things look right instead of spending it on making sure we’re doing it right. Or doing it at all.

So, what were we talking about? Oh, yeah. Me not knitting an afghan.

:P

As always, tinks are on me.

Knit|tinK: EarthSea Socks

These were a long time coming. Slow knitter, frequent tinker = Me. Remember when I dyed some sock yarn with black beans? I finally got that yarn knitted up into some socks. Took a while, because I played around with different construction, and ultimately changed needle size entirely. And, you know, I moved and they sat in a box for a while until I dug them out a couple weeks ago and started over again. Moving is bad for craftal expediency.

These socks were knit toe up on 2 circulars, two-at-a-time. I always begin toe-up socks with a Turkish cast-on. It is my favoritest ever—so easy to do and, most importantly, very easy to remember how to do. Mind like a sieve. Then I knit my standard Super Rounded Toe which goes something like this:

Part One:
After casting on a reasonable amount of stitches (I cast on 9 stitches per side for a total of 18 stitches, and I wear a US size 9 shoe), increase 4 stitches every row until 1/2 the number of needed increases are made. The increases are made at the beginning and end of each half of the sock—2 stitches on the instep and 2 stitches on the sole.

I do my increases like this:

Row one: K1, Inc, knit however many, Inc, K1 (repeat for second needle)
Row two: K3, Inc, knit however many, Inc, K3 (repeat for second needle)

Rinse, repeat.

EZ’s backward loop cast-on and the lifted increase both work very well. I did an EZ increase for the first set of increases and lifted increases after that.

Part Two: 
Increase in the same manner every other row until only 3 increase rows are needed.

Part Three: 
After last increase row from Part 2, knit 2 rows plain. Increase, then knit 3 rows plain. Increase, then knit 4 rows plain. Increase one last time. Then carry on with the sock.

This method works really well for making a nice rounded toe as opposed to the typical pointy toe that many sock recipes call for. Below you can see the difference between a standard toe and my Super Rounded Toe that I did for Dave’s Business Socks:

And then for some extra fun, I did something different for these socks that I’ve never tried before—I knit afterthought heels. It was convenient because I got to the heels while we were at a Comic Con with the kids, and I really didn’t want to stop knitting, which I would have had to do for any other heel type. Mind like a sieve, remember? However, I grossly underestimated the amount of waste yarn I’d need to mark my placement for the heels and had to improvise in order to survive. Not much yarn to be had at a Comic Con.  I did, however, find a plastic bag that someone left on a bench. So I ripped a long strip off of it, gave it some twist, and continued knitting merrily on my way. You do what you gotta do out in the wild.

A word about afterthought heels. EZ (Elizabeth Zimmermann, the Great and Powerful Oz) only gives an outline for how to do this method, requiring, as she does, for us to use our own brains. So I did some interweb research to try to find out more information as to avoid unnecessary and repeated tinkage. One can but try. In particular, I wanted to know exactly where the waste yarn (or for the very brave, the cutting!) should be placed. The interwebz proved very vague on this point. My inclination was to place the waste yarn in the same location where one would start a Sweet Tomato Heel–just before the ball of the heel directly below the crease where the ankle turns into the instep. I found one reference that agreed with this placement, and so I ran with it. Which was a good call, because it fit perfectly.

Then I knit up to the top, added some ribbing and finished with EZ’s sewn bind-off, which again, is my favoritest.

A note on the yarn at this point: Argh. It turns out that ammonia is a pretty harsh modifier. There was breakage within the skein, but only where I modified it with ammonia. Those are the greenish coloured sections. Clearly I applied it too strong for too long. Lesson learned. Because of the number of places where I had to piece the yarn back together (nothing crazy, but enough to be annoying), I don’t expect these to hold up too long.

After the bind off, went back and picked up the stitches on either side of the plastic bag waste yarn. Then I snipped and removed the waste yarn (easier said than done) and was left with the sole stitches (half of the total stitches) on two needles.

At this point, I had to experiment a little bit. In my reading about afterthought heels, one complaint I encountered was that the heel didn’t fit well—specifically, that it pulled too tight across the instep. My first thought for correcting this was to add some short rows in the corners on each side in order to add a bit more depth. I tried this, and while it added the needed depth, it also created a little puckery pocket on each side of the heel. Boooo! That was not attractive. Tink!

I fixed the problem by picking up additional stitches in each corner (4 on each side) and then knitting 5 rows plain before beginning the decreases for the heel. This worked beautifully. The afterthought heel is essentially a toe. Yup. You knit a toe where the heel is and, miracle of miracles, it fits.  After knitting 5 rows plain, I began decreasing 4 stitches every other row. Just like on the toe, these were done at each corner of each half of the sock, leaving a knit stitch worked at the end: K1, K2tog, knit however many, K2tog, K1. I did not do matched decreases, I just did K2tog. It works fine. When I got to the last few rows, I decreased every row until I had 9 stitches on each needle (18 total).

Then I committed the Kitchener Stitch.

Here are the finished socks:

I was skeptical about how the afterthought heels would fit, but they’re actually really comfortable. The only thing I don’t like about them is the impossible donkey ears of the Kitchener grafting. I worked the first two and last two stitches together to improve the issue, but it doesn’t entirely correct it.  See what I mean?

In the future, I think I’d try a star decrease pattern on the heel instead.

It was interesting to see how my haphazard over-dye job knit up on these socks. What is most curious is that one sock is quite a bit darker than the other. I want to learn more about dyeing for different striping patterns. More to play with. :D

As always, tinks on me. ;)  Tune in next time for some cute baby knits.


Knit|tinK: Parkour Handwarmers

I actually have been knitting. ;)  I whipped up these handwarmers for my son over the winter holiday break. He asked for a pair of handwarmers and had a few specific requirements for them—that they be grey, and fit a certain length on the fingers. We have the same size hands right now (yeah, my hands are the size of a 14 year old boy’s) so it was easy to measure as I knit along. They were a fun, quick knit and fit really well. Full notes are on my Ravelry page. While I made up the formula for the mitts from my very own brainz, the thumb increase was a pretty close interpretation of the gusset in Kim Christensen’s Garden Mitts. I used a different weight of yarn, and my gauge (and therefore my math) was totally different, which required me to rework her instructions somewhat. I also completely changed how the thumb was set in, just ’cause I was playing around with ideas. However, the basic gusset method is hers, and I think it’s awesome. Very clever.


I tink therefore I am. ;)


Knit|tinK: A Witch’s House Socks

a witch's house socks 1-22-2013 3-42-11 PM

It took me quite a while to figure out what I wanted to knit with all the yarn samples I dyed on Dye Day #1, but it finally came to me in a semi-blinding flash:  house socks. But not just any house socks.  I wanted to knit a pair of house socks like I imagine Tiffany Aching or Nanny Ogg wearing—thick and warm, functional yet quirky.  If you aren’t familiar with Tiffany Aching or Nanny Ogg, they are two characters from one of my favourite series of books ever in the history of the history:  The Wee Free Men, A Hat Full of Sky, Wintersmith, and I Shall Wear Midnight—all by the amazing author Terry Pratchett.  I will not wax on about the books here, but suffice it to say that they have depths, and although I do not call myself “witch”, if I were to be a witch, I’d want to be Tiffany Aching.

So.  Socks.  Here they are.

a witch's house socks 1-22-2013 3-39-28 PMKnit toe-up using my trusty go-to sock knitting formula:  Turkish cast-on, my super-easy-super-rounded toe, Cat Bordhi’s Sweet Tomato Heel, Techknitting’s ribbing transition row, and Elizabeth Zimmermann’s sewn bind off.  I meant to do jogless stripes on these, but I totally forgot.  Lol.

a witch's house socks 1-20-2013 11-03-53 AMI went for a thicker stripe on these—8 rows.  It not only had the look I wanted, but it meant weaving in fewer ends.  I love stripes, but, man, I always forget how much I hate weaving in all those ends.  I call this “stripe amnesia”.  It gets me every time.  48 ends per pair, not including the toe and cuff.  Oy!

a witch's house socks 1-13-2013 1-19-00 AMBut I really like how all of the hand dyed colours went together.  I especially like how much greener the red onion yarn looks next to some of the other colours.  Here’s the line-up:

a witch's house socks 1-22-2013 3-38-015

Starting at the toe—

  1. Birch bark overdyed with yellow onion skins
  2. Osage orange FAIL overdyed with eucalyptus exhaust
  3. Annatto seed
  4. Eucalyptus
  5. Alkanet root
  6. Red onion skins
  7. Safflower exhaust
  8. Yellow onion skins
  9. Red onion skins exhaust
  10. Alkanet root
  11. Walnut creme overdyed with annatto
  12. Birch bark overdyed with yellow onion skins
  13. Eucalyptus
  14. Yellow onion skins
  15. Annatto seed
  16. Red onion skins
  17. Elm bark
  18. Safflower exhaust
  19. Red onion exhaust
  20. Osage orange FAIL overdyed with eucalyptus
  21. Alkanet root
  22. Eucalyptus
  23. Walnut creme overdyed with alkanet
  24. Birch bark overdyed with yellow onion skins
  25. Red onion skins

When I was knitting these, I thought that I would stitch felted soles on so that I could pad around the house without worrying about wearing holes in them.  But when all was said and done, I decided that I’d like to be able to wear them in shoes, too.  So I left the felted soles off for now.  We’ll see if I change my mind.  I loved knitting worsted weight socks.  I love wearing them, too.  Super ridiculously cozy and warm.  Perfect for this cold weather.  Glad I got them done before spring!

Live happy, dye happy!   And knit happy, too!


At the Burrow DyeTable # Five: Red Onion Revisited

After seeing the awesome green that my class got from the red onion skin dyebath the other day, I didn’t have the heart to chuck out the exhaust.  I knew that most likely my results from the same bath, which had been sitting on the back porch for 3 days, would be quite different, but I had yarn already mordanted practically screaming at me to go play.  So, play I did.  Husband kept me company, which made the whole thing infinitely more enjoyable, and I really like dyeing, so this was pretty damn good.

And, in the middle of it all, we heard a loud noise, looked up in the sky, and saw this behemoth flying low, low, low overhead.  Unexpected, right?  It had propellers.

Alright.  Back to work.

Dye Notes:

Dyestuff:  Red onions

Parts used:  The papery outer skins

Source:  The restaurant where I work, my kitchen, and grocery store onion bins

Ratio of dyestuff to yarn:  The original dyebath was roughly a .75:1 ratio of skins to yarn.  If I were to go strictly by weight for this exhaust bath, it would be about 200g onion skins to roughly 36g yarn, which is a just about a 5.6:1 ratio.  However, since this is an exhaust bath, and I have no idea how one would even begin to calculate how much dye has already been removed from the skins, the weight of said skins is very nearly meaningless.  I wish there was some way to figure it out, but it is beyond my arithmetical skillz, of which there are few.

Yarn:  Lion Brand Fisherman’s Wool mordanted with 8% aluminum potassium sulfate and 7% cream of tartar.

Dyebath:  Added just a little glug of white distilled vinegar before heating, thinking that lowering the pH might help me get the pinks that red onion are supposed to give in a more acidic bath.  The pH at room temp. was 3.6.  Once the bath came up to temperature (195F), I remeasured the pH to be 3.4.  Initially, when the yarn was added (at room temp.), it seemed to take in the claret colour.  But as soon as the bath started heating up, it became clear that it was going to turn toward yellow.  Eeeeeenteresting….  Held the dyebath between 175F-195F for 1 hour and then let the yarn cool in the pot for several hours.

The results?  A weird burnished golden green.  Here it is straight from the dyebath:

And here is the skein after being rinsed and dried.  That is NOT pink.

It’s hard to describe just what this colour is.  The picture doesn’t capture just how much of a strange, otherworldly green cast it has.  The best way to describe it would be to call it… tarnished.  I rather like it.  But it is not what I was expecting.

_____________________________________________________

Then later the same day another little hank of premordanted yarn called to me, and I decided to bump up the pH dyebath and try it one more time.  It still seemed to have so much colour in it.  So I added enough washing soda to get the pH up to 9.4 at temperature.  The colour of the bath immediately went from red to green.

In the original dyebath, after we got the pH over 9, we saw the same colour shift of the bath, but then it turned acidic (and red) again pretty quickly.  I assumed this was because I’d left the bag of onion skins in the bath and that they were still influencing the pH.  So this time, I took the bag out before bumping up the pH. I did, however, add a few fresh red onion skins I’d snagged from the restaurant this week.  No more than a couple grams.

But it didn’t make any difference.  Even though the bath stayed green for the hour that I heated it (in the same 175-195F window). after it was left to cool overnight, the next morning it was claret red again.

The results?  Not green.  Or pink.

So what was going on here?  I must begin with the disclaimer that I have no idea.  But if I were to guess, it would be that there are a couple different components to whatever compounds are in red onion skins that make them red, and that the uptake of those components occur at different times.  It is my understanding that if you take red onion skins and make a fresh dyebath with them, and leave the bath acidic, you can get pinks on your fiber.  If you take that same fresh dyebath and make it basic instead, you will get greens on your yarn—even though the bath looks red.   And that is exactly what happened with the original bath.   The kids got green yarn.  Very green.  Clearly, in the first exhaust bath, the green dye was all but gone.  In the second bath there was none left—even though the bath was alkaline.   So, I would venture to say that making the bath alkaline is what extracts the component that dyes green, and that it is taken up before the other components that dye either pink or yellow.  I would like to try red onion again and get pink from it, because I think this would help clarify what is happening chemically in this bath.  I’m really just guessing about all of it at this point.

Any of you have experience dyeing with red onion skins?  What do you think?

Live happy, dye happy!

At the Burrow DyeTable #Four: Forbidden

I have to apologize for my oversights, my rushing.  I like to suss things out.  To dig in up to my elbows for a bit, and then stand back and think on things before I jump back in the middle again.  But this requires time, and life has other ideas about what I’m supposed to be doing.   I rarely find the long, meandering swaths of hours that it requires for me to fully go deep into the Fetch and dance with my creative mojo.  Instead I have to steal minutes here and there and I end up hurrying through steps I’d rather linger over.  I forget my camera.  I forget my notebook.   I lose the flowing narrative and instead piece together fragments and partial thoughts and hope for poetry.

So it was when I dyed with forbidden rice.

This bag of black rice had been sitting in my pantry for months waiting for me.  I finally stole a moment for it.  Haphazard.  Slapdash.  Hardly the way one should treat something forbidden.  But that’s how it happened, and that’s what I must own.

Dye Notes:

Dyestuff:  Forbidden rice

Part used:  The grains of rice

Sourec:  Whole Foods bulk bin

Ratio of dyestuff to fiber:  412g of rice to 38g of fiber; just under 11:1 ratio.

Yarn:  Catnip Yarns Kona Superwash Worsted   38g, mordanted with 8% aluminum potassium sulfate and 7% cream of tartar.  I’m not usually a big fan of superwash, because the processes used to make yarn superwash are typically not terribly sustainable, and they frequently over-process the wool and make it lose its character.  This yarn, however, is absolutely scrummy.  It is super, super, super soft and has a beautiful sheen.  Absolutely lovely.  I don’t know how they did it, but next time I need superwash, it will be Kona for sure.

Extraction:  I soaked the rice in tapwater overnight (about 10-12 hours).  Pretty much just like I’d do black beans.  Didn’t measure pH.  Gasp!

Dyebath:  I strained out all the rice through a colander and reserved the liquid.  It didn’t seem to have as much particulate in it as black bean juice does, so I did not bother with ladling the liquid off the top of the bowl and instead used all of it.  I put the dyebath and yarn in a stainless steel bucket and left it outside.

After roughly 40 hours, I rinsed the skein in plain water and hung it to dry.

The results?  A colour I like to call Sickly Lavendar.  Or Lavendar Lite.  Or Maybe One Day I’ll Grow Up and Become A Real Lavendar!

It’s got a couple spots that lean toward blue.  The overal colour is a little mottled, which actually makes the effect more interesting, I think.  After doing this experiment, I went on Ravelry and did a search to see if anyone has played with black rice.  A few people talked about it, but I only saw one actual result, and it was a very pretty deep lavendar-blue.  The difference?  She didn’t treat it like black beans at all—-she simmered hers!  Clever!  I’m thinking about getting more rice and either overdyeing this skein or dyeing a new skein with the hot technique to see the difference.

It’s been fun these last months playing with dyes from foodstuffs.  It makes me look at everything I eat with an eye for the potential dye hidden under the surface…

Live happy, dye happy!

At the Burrow DyeTable # Six: Poke for Pia

My fiber friend, Pia, asked me to do a little experiment for her.  She asked me to do a cold dye process with the pokeberries.  And so I did.  After all, far be it from me to ignore an opportunity to experiment, to leave our curiousity hanging.  Thank you, Pia, for your request.  I would not have thought to run a cold dyebath with pokeberries.

Dye Notes:

Dyestuff:  Pokeweed (phytolacca americana)

Parts used:  The berries

Source:  My yard, the Haggencrone’s yard, a friend’s yard, and the farm

Yarn:  Mountain Meadows Cody mordanted in vinegar as per the instructions in Harvesting Color by Rebecca Burgess.

Ratio of dyestuff to fiber:  No clue.  These were some of the pokeberries preserved in vinegar that wouldn’t fit in the original poke dyepot.  So I left them in a Mason jar.  I’d guess maybe 200g of berries.  Maybe more, maybe less.  Hard to tell.  The little mini-skein of yarn weighs 6g.

Extraction:  Mashed the berries in white distilled vinegar and left them for a month out of the sunlight.

Dyebath:  Cold dyed in a Mason jar.  No sunlight.  Nine days.

The results?

The top of the dye liquid formed a white film.  Some kind of funk.  It didn’t really smell bad, though, nor did it seem to effect the colour below.  The funk rinsed off easily and didn’t seem to do anything negative to the yarn.

  Boy, is this yarn purple.  I mean PURPLE, like whoa.

It only got a little bit lighter with rinsing in plain tapwater.  It is a gorgeous colour.  And I am thankful to Pia for asking me to do this little experiment so that I could learn about yet another colour from the poke’s most unredundant bounty.

This is my favourite yet.

We’ll see if the colour lasts.  If so, this is my new go-to way to dye with pokeberries, hands down.  Pia, I hope you are happy with the pokeberry results, too.  :D

Live happy, dye happy!

At the Burrow DyeTable # 2: Long, Long Pot of Poke

My friend Laura came over to share in the fun of this dyepot.  I figured, while it’s still giving, might as well keep sharing.  She opted to bring some superwash skeins, which is cool, because I was curious how they’d take up the dye.   For the second exhaust bath, I opted to follow the exact same procedure as in the first dyebath with one exception:  After the 2 hour simmer, I left the skeins in the dyebath—for 2 days.   I thought it might help with fastness since the amount of dye in the pot is lessening with each exhaust.  During this time, the weather went from 80-some degrees to 30-some degrees!  Way to go, crazyass Missouri weather.  Pulling those skeins out of the dyebath was cold!  I let them hang out in the chilly air for several hours, and then I brought them inside to rinse.  For all of these pokeberry dyepots, I rinsed in a bucket of water with a dash of vinegar because my water is alkaline at pH 8.8, and I was afraid of that effecting the colour.  No soap or even Soak or Eucalan.  Rinsed until the water ran clear (or I ran out of patience).

Here are the results from the second exhaust bath (which is the third overall use of this dyepot):  Notice how much darker the two skeins on the left are.  They are both superwash.  The third skein over is a mohair boucle, and the rightermost (yeah, i just said that) is more Mountain Meadows Cody wool.  That boucle’s got some shine on it.  On a technical note, it’s really hard to photograph these colours accurately.  I’ve tried to get them as true as possible, but it took some doing.

And here is the line-up of all the pokeberry dyepot results so far.  From left to right you have:  Original dyepot, 1st exhaust, 2nd exhaust superwash, and 2nd exhaust wool.

I think that it’s interesting that we’ve moved from plums and raspberries to peachy-salmon tones.  I expected the colours to stay more in the same colour family and to just get lighter and lighter.  I did not expect it to jump to a totally different hue.  Now I’m wondering what I’ll do with them.  Oh, no!  I’ve got to look at patterns!  Lolz.  I’ve got to prepare for a kid’s class that I’m teaching on Wednesday, and I need my pot back.  But I’m tempted to do just one more before I let this one go.  We’ll see.  Until then,

Live happy, dye happy!

Post Navigation