Grackle & Sun

Search Results for: “pokeberry

The Fast and the Fugitive: Pokeberry Edition

It is once again time to play…

IMG_0001

OR

IMG_0002

I sandwiched the samples from each of the original pokeberry dyebaths between heavy cardboard and taped it up against a south-facing window for a month.  All yarn is 100% wool mordanted with vinegar only.  Here are the results:

Pokeberry–First Dyebath

Pokeberry Lightfastness Test Results 11-17-2012 2-25-02 PMPokeberry Lightfastness Test Results 11-17-2012 2-24-25 PM

Pokeberry–Second Dyebath (First exhaust)

Pokeberry Lightfastness Test Results 11-17-2012 2-26-29 PMPokeberry Lightfastness Test Results 11-17-2012 2-26-05 PM

Pokeberry Lightfastness Test Results 11-17-2012 2-27-47 PMPokeberry Lightfastness Test Results 11-17-2012 2-27-35 PM

Pokeberry—Third Dyebath (Second Exhaust):  These are on superwash wool.  Somehow I didn’t test the skein of regular wool from this bath.  Not sure why.

Pokeberry Lightfastness Test Results 11-17-2012 2-29-10 PMPokeberry Lightfastness Test Results 11-17-2012 2-28-43 PM

Pokeberry—Cold Dyebath

Pokeberry Lightfastness Test Results 11-17-2012 2-30-47 PMPokeberry Lightfastness Test Results 11-17-2012 2-30-05 PMSo far, I think everything is as should be expected.  We know that pokeberry is not normally lightfast, but that with proper mordanting and dyeweight ratios, can be made more so.   You can see a substantial difference in the lightfastness between the original dyebath and the two exhaust baths.  Here is the good news.  This lightfastness test was conducted in a room in my house lovingly known as The Snug, short for Snuggery, aka the Sun Room.  It is a very tiny little nook of a room made entirely of mullioned windows.  For the purposes of this post, that means that anything in the room gets not only full south-facing sun, but also east and west sun, as well.  The photos you’ve seen so far are of the side of the yarn which had direct south-facing exposure pressed right up on the glass.  The next series of photos are of the back side of the exposed yarn—the side exposed to normal daily levels of ambient light from the east and west windows.  You can just see the outlines of the direct-exposed areas.  It’s like the yarn has tan lines.  Look at this:

First Dyebath

Pokeberry Lightfastness Test Results 11-17-2012 2-25-17 PM

Second Dyebath (First Exhaust)

Pokeberry Lightfastness Test Results 11-17-2012 2-26-42 PMPokeberry Lightfastness Test Results 11-17-2012 2-28-01 PM

Third Dyebath (Second Exhaust)

Pokeberry Lightfastness Test Results 11-17-2012 2-29-23 PM

Pretty cool, huhn?  The first dyebath had almost no fading on the ambient-exposed side of the yarn.  The exhaust baths had very little.  I think this is a good sign that these pokeberry dyed yarns will stand up to regular wear in normal lighting.  I mean, it’s not like anyone is going to be wearing handknit items when the UV levels are crazy high, so I’m not terribly worried about it.  I’m particularly impressed with the cold dye process.  Not only did it dye awesomely, but it was the most lightfast out of the bunch, too.  The back side of the sample was as purple as the covered section.  It was just hard to get a good picture of it.

Next, I’ve got to get lightfastness tests of the raceme dyelots.  Gotta wait for more sun, though.  Until then,

Live happy, dye happy!

Fiber Retreat

This last weekend, I had the pleasure of attending a Fiber Retreat with a dear friend of mine, E.  You might remember E from our pokeberry dye fun.   We had a blast. Mad skillz, friendly people, and more homegrown fiber than you could shake a weaving stick at.  I think that was my favorite part of the whole weekend—meeting all of the local fiber farmers who set up in the market.  I believe in supporting local, sustainable, and small farmers, crafts-people, and artisans, and I love attending venues that focus on local rather than commercial goods.  Besides, small batch homegrown wool has so much character and life—once you’ve worked with it, you don’t want anything else.  The market was packed with luscious wool, alpaca, llama, and mohair.  It was also really cool to meet so many highly talented fiber artists from my state—many of whom live in small towns and out of the way places where the unsuspecting might be surprised to find such artistic genius.

I took three classes at the fiber retreat:  weaving sticks, continuous strand weaving, and wet felting.  Three things I have never done before.  The classes were lively, the teachers were wonderful.   So let’s go on a little photo journey of newly acquired craft knowledge:

Weaving Sticks
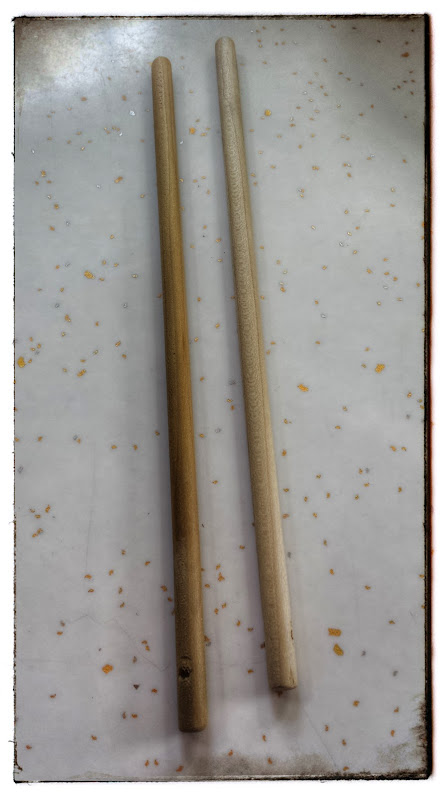
The history of stick weaving is not well defined online.  Some claim it was used by Native Americans, others that it was brought to Europe by the Crusaders, and yet others claim that it was actually developed as recently as the 1940’s.  However, I’ve seen no actual proof in any of these assertions—no references or photos of any kind, and it seems that the same information about the history of stick weaving is simply being passed around from site to site.  My thought, however, is that we know weaving has been around for many thousands of years, and this method is so simple that surely somebody somewhere used it.  In conclusion, I have no idea what the real history of stick weaving is.  If any of you weavers out there do, I’d love to know!

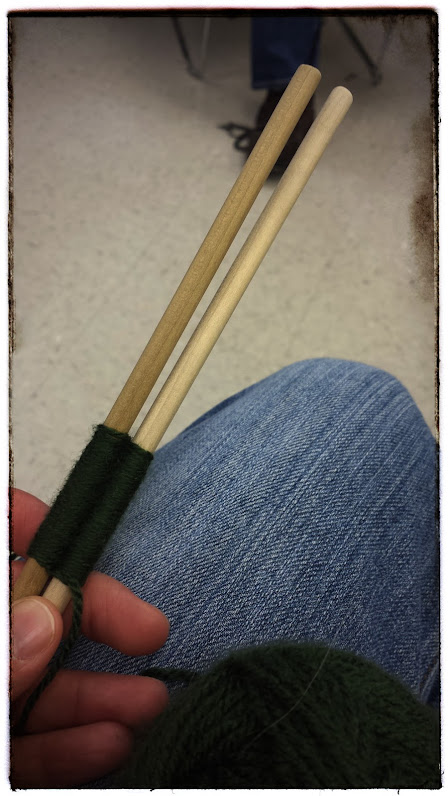
Stick weaving is a very simple form of weaving.  It is essentially the same process as weaving on a peg loom, only instead of the pegs being fixed, you hold them.  This can be done with as few as two sticks or as many as you can hold.  Each stick has an eye, and like a needle, is threaded with what will become the warp.  Our warp yarn was too thick to go through the stick holes, so an extra string was threaded through those to create a bigger loop that hung down below the stick.  You can this this in the photo below.
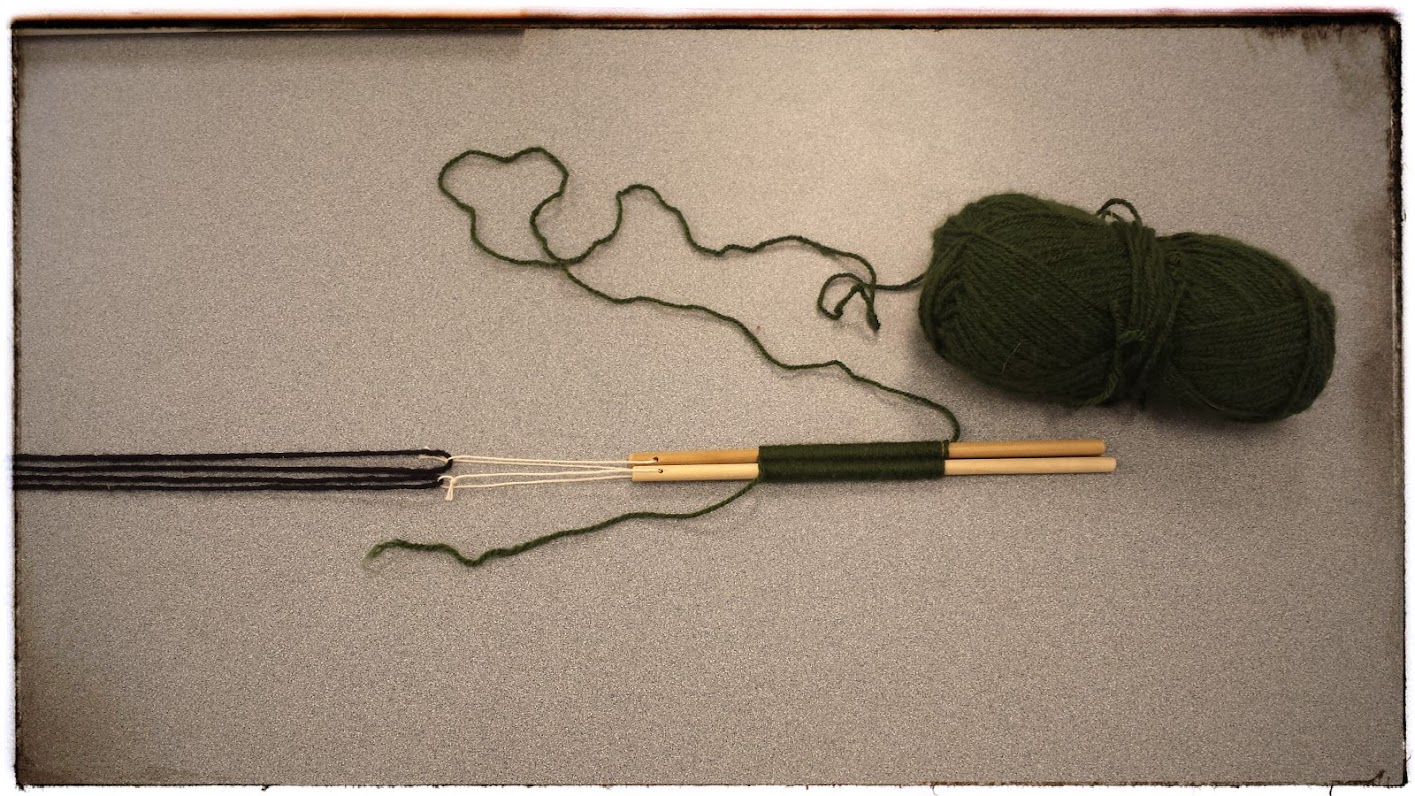
The the working yarn is woven in a figure eight (for two sticks) or a serpentine (for more than two sticks) fashion around the sticks.  This is the fun part.  It is very soothing.  Mindless and rhythmic.  As the weaving is done, it is pushed down on the stick to keep a nice even tension.
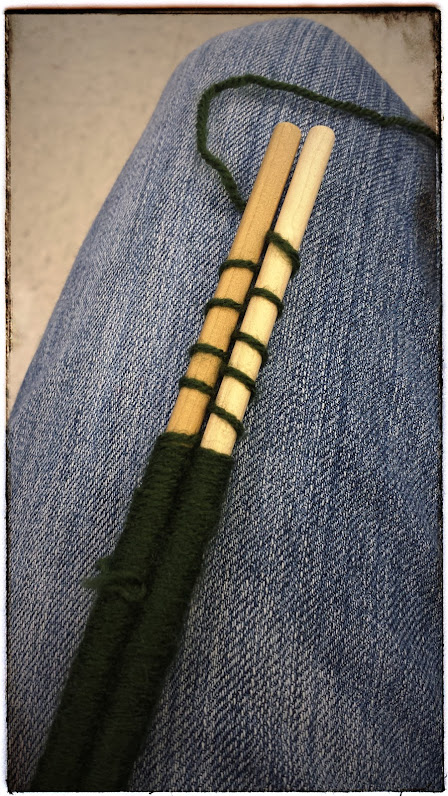
When enough woven yarn is on the sticks, it is pushed down onto the warp yarn. This process can be more difficult than it sounds.  It took a lot of wiggling.  Smoother, polished sticks would be the way to go. This is done over and over until you have the length you want for your project.  Of course, shorter sections can be joined together in a project, as well.

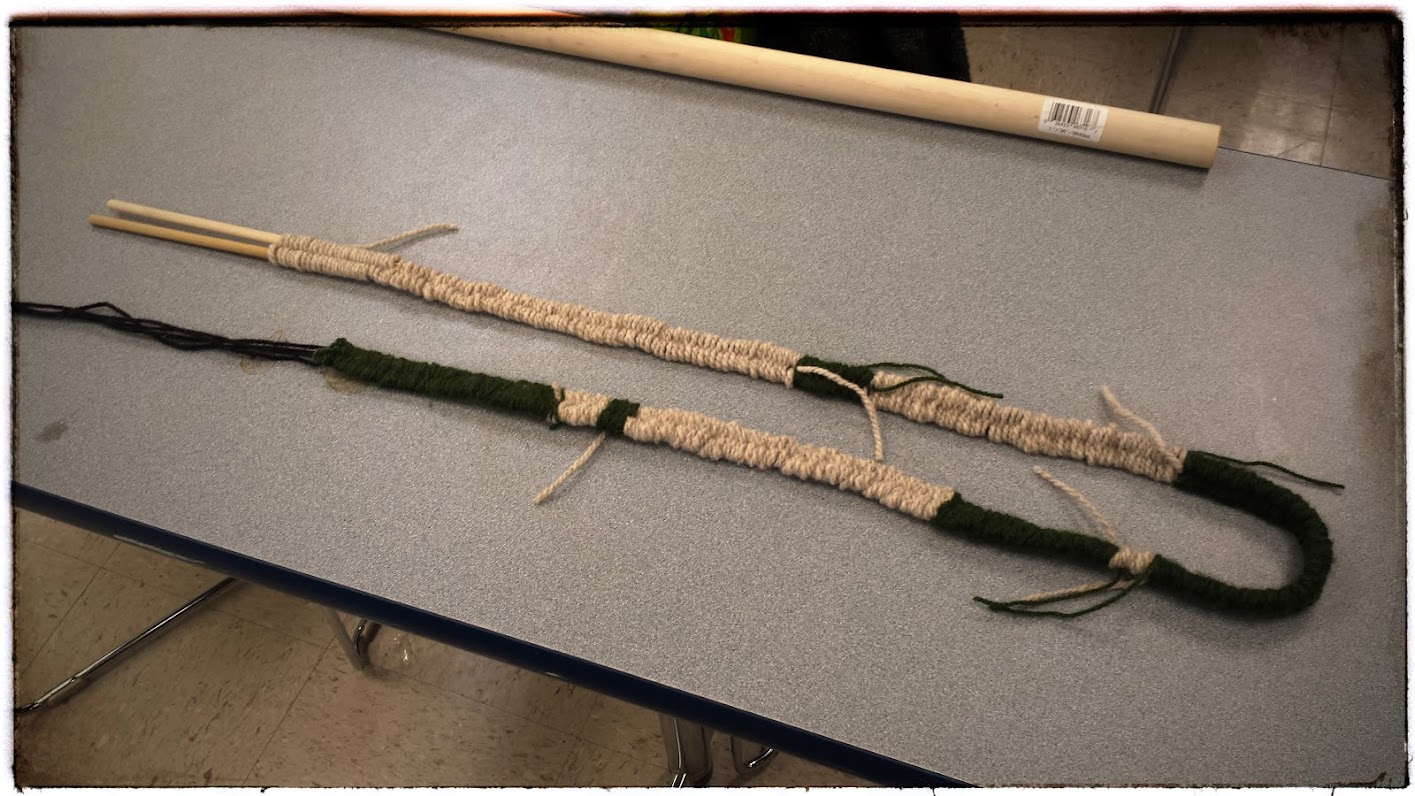
Here you can see the long strand in progress, including the colour changes and unwoven ends.
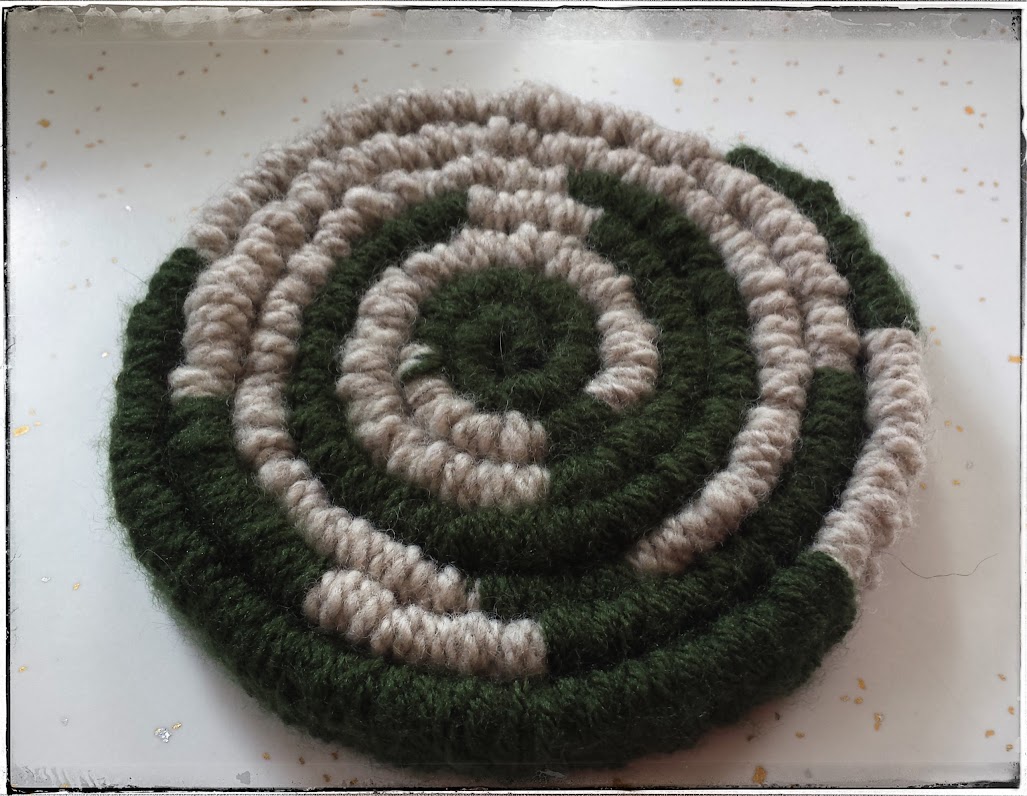
This is what my finished mug rug will look like if and when I get around to whip-stitching it together.  Our teacher recommended doing the whip-stitching on both sides of the piece so that it maintains its shape without splaying out.  It is fairly fugly, but it represents new skills and a lot of fun, so I am happy.  I can see how with a little measuring, the colour changes could be coordinated in cool ways.  Because the strip is stitched together coiled along its flat edge, the finished piece is as thick as the width of the strip.  This makes for very thick, cushy rugs or cushions. I’d also like to try stitching the strips together lengthwise to make a flatter rug.  This could be easily done with wider strips woven on 4 or 5 sticks.
Continuous Strand Weaving

My only experience with weaving is with basket weaving using bark and plant fibers. I’ve never woven on a loom, not even to make a potholder as a child. I am fascinated with woven fabric.  It is beautiful.  Now that Ravelry has added weaving to the mix, I find myself looking at a shawl or scarf wondering what gorgeous stitch pattern was used to create that texture—and discovering it was woven.  Happens all the time.

Continuous strand weaving is interesting in that rather than pre-warping the loom,  it warps and weaves the loom as you go.  It is also interesting in that the weaving process occurs symmetrically from two opposite sides as you go.  I know next to nothing about weaving, and so cannot articulate this in any way other than to say it is magical.  There are many tutorials and videos online if you search “continuous strand weaving” or “triangle weaving”.  It can be done on rectangle and square looms, also. Our class did a travel size triangle and then a travel size square.  Below you can see the triangle loom weaving in progress, with the weaving happening on both sides and working in toward the center.

And then before I took it off the loom.

Here is the finished triangular piece:

And the finished square piece.
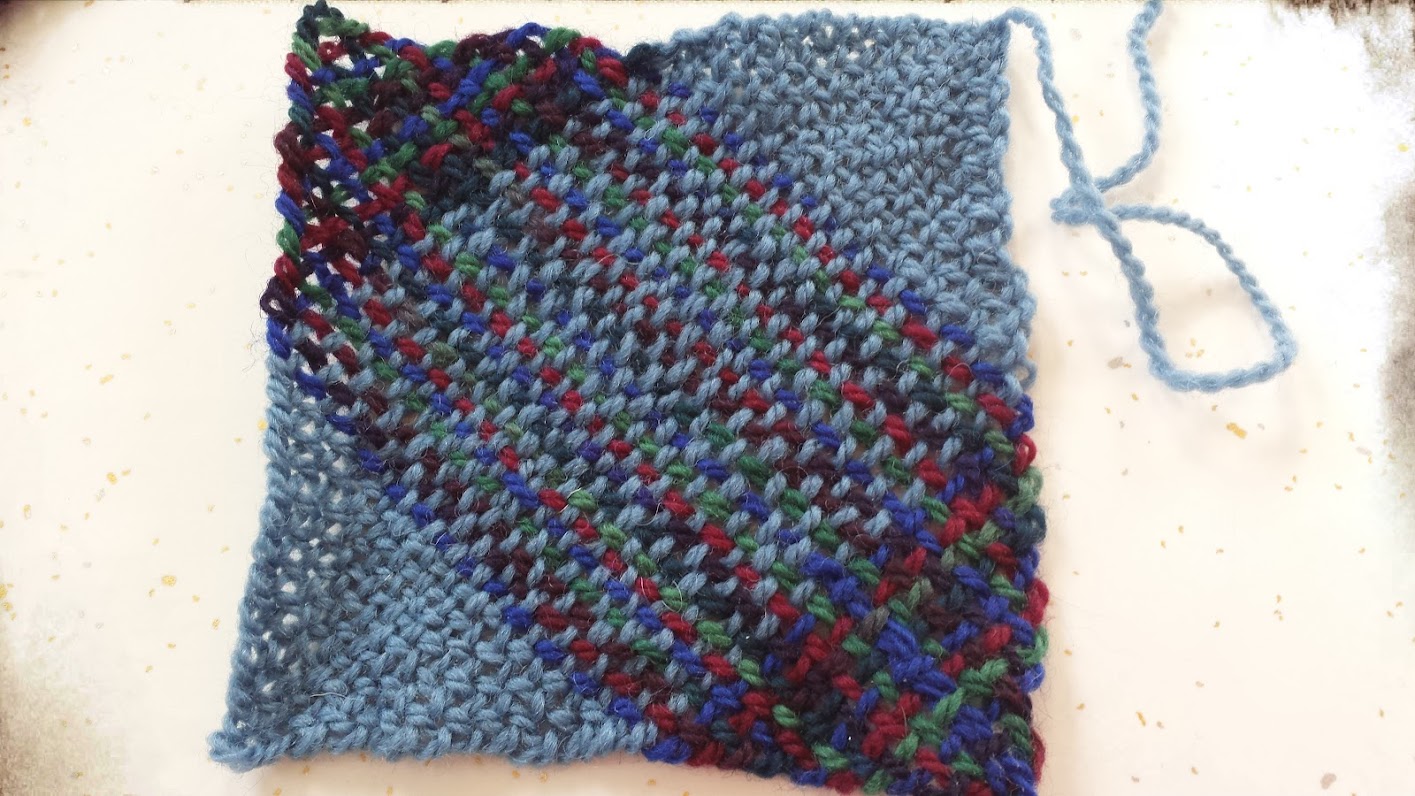
Fact:  My weaving in of ends leaves much to be desired.  And despite triple-checking my work before I took it off the loom, the square piece has a glaring error in it.  Ain’t that the way.  I won’t point it out as I’m sure the weavers out there have already spotted the mistake.  For everyone else, it can be a fun search puzzle.  :P

Weaving FTW!

Wet Felting Boots

Actually, the class was wet felting boots or mittens.  I chose boots, because BOOTS! I enjoyed this class a lot—not only for the fun people, great teacher, and neat new skill, but because wet felting is a very physical craft.  You can’t sit and demurely make wet felted boots—you have to put your whole body into it, and I really liked that.  If you are not familiar with wet felting, it is the process of causing the microscopic scales on wool fibers to lock on to each other through heat and/or agitation, and is often done in conjunction with a healthy squirt of soap.  This interlocking of the fiber’s scales creates a dense woolen fabric called felt.  Wet felting is done with wool roving or batts.  When heat/agitation is applied to already knitted goods, it is called “fulling”, although the two terms are often used interchangeably because the final fabric is still called felt. My good friend Laura over at Mommayaya makes the coolest felted (but actually fulled) slippers, and it was talking to her and watching her work that got me interested in this whole felting/fulling thing and taught me the difference between the two.

The first step to making our boots was creating the resist or form that would give the shape of our boots.  In order to do this, we traced our shoes on a piece of paperboard.  After our shoes were traced, we added an inch all the way around. Since felting shrinks the wool, we had to make our resist bigger than the final size we wanted.  So we traced our left and right foot on the same piece of paperboard.  With me so far?  Because this is where things got funny, and I’ll explain why in a minute. The next step was to join the left and right feet with a “leg”.  Here you can see the resist–two feet and a central “leg”– cut out and ready for wrapping:
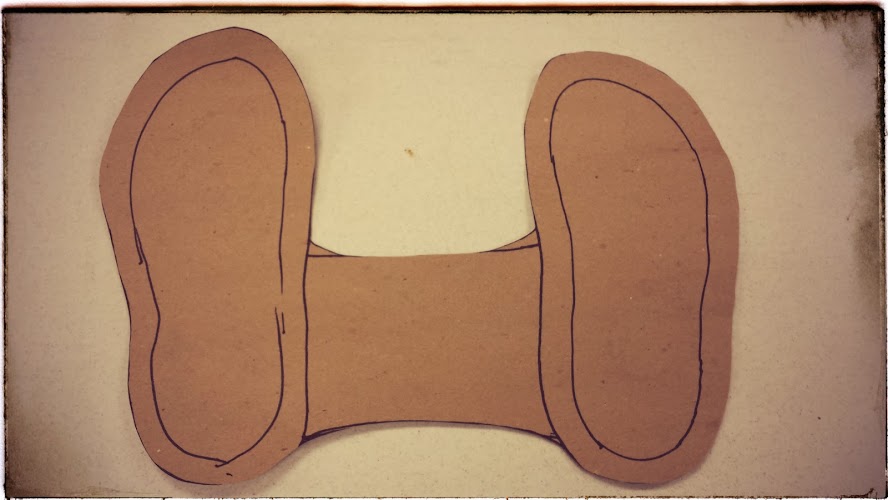
So basically, we would be making both boots at the same time, and the “leg” we drew in the middle would form the ankle part of each boot.  “But wait!” I hear you say.  The foot is drawn flat on one axis, and the leg on another. Yup.  I asked about this, too, because you see, on the day I took this class, I was wearing a pair of crunchy granola Birkenstock foot-shaped shoes.  You can see in the photo above that my shoe has a definite left and right toe rather than the generic roundness or pointiness of most shoes.  And if you’re wondering what the point of that is, we simply have to rotate the picture:
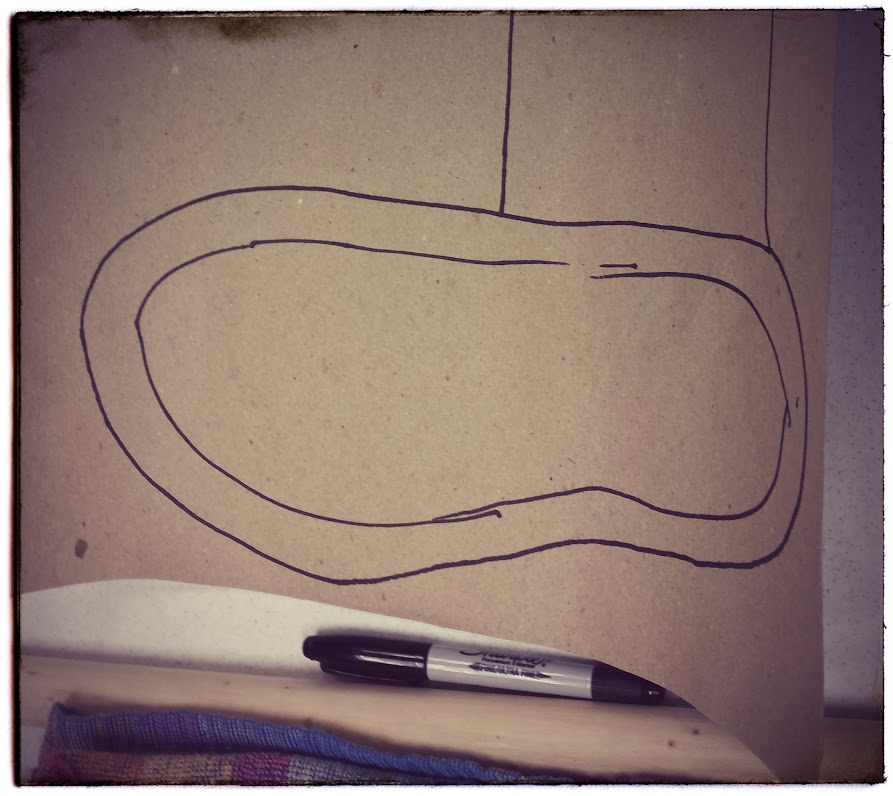
This orientation shows the actual shape that the boot will take when it’s felted.  And because of my funny shoe shape, I highly expected a funny boot shape outcome.  However, my teacher reassured me that it would be fine.  So I went with it.  What the heck, I was having fun.

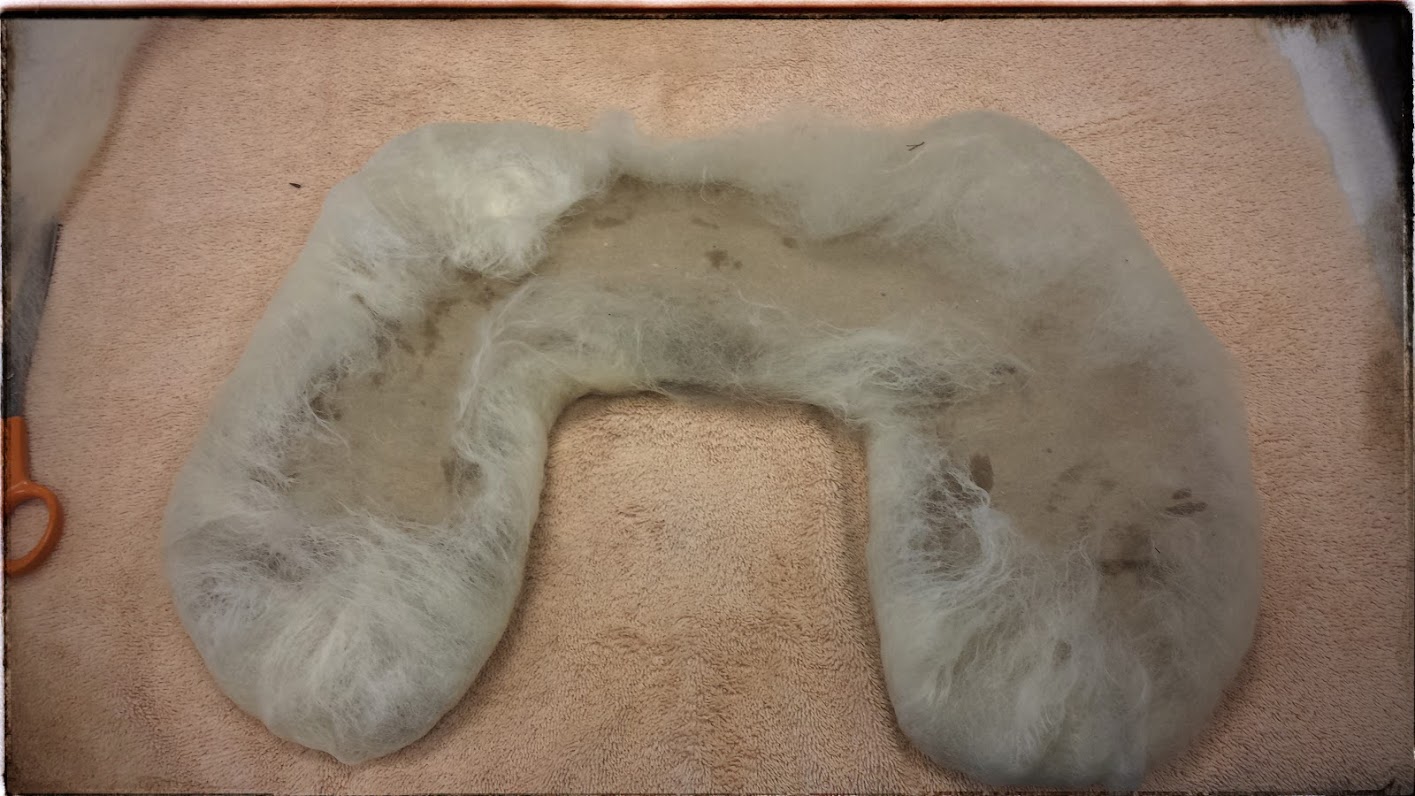
The wool was arranged on the resist in two directions, layer by layer—toe to heel and side to side.  We sprayed the layers down with soapy water as we worked and flipped the piece over to cover each side, wrapping the overlapping edges to secure each side firmly.  Below I’ve completed two layers on the one side of the resist and have flipped it over, wrapped the overlap, and am ready to begin applying the first layer on that side.  The most difficult part of this step was keeping the wool wrapped as tightly around the resist as possible.
After all the layers were done, the piece was ready to felt.  We resprayed the whole thing with soapy water, put a layer of tulle around the piece, and rolled the whole thing up around a 1″ dowel.
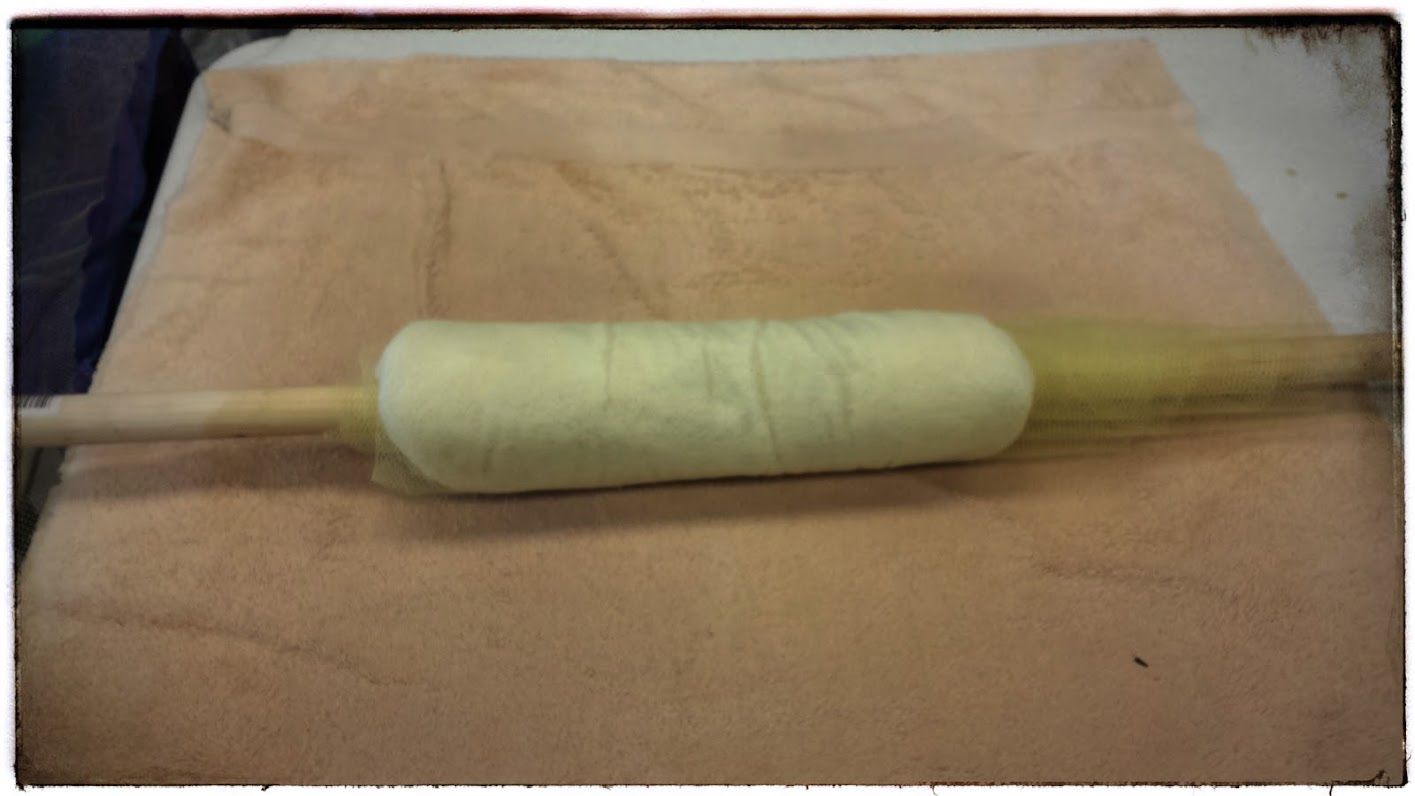
Then the fun began!  Rolling and rolling and rolling and rolling and rolling and rolling, turning, and rolling and rolling and rolling and rolling, flipping, and rolling and rolling and rolling.  We rolled, flipped, rolled, turned, and rolled for AGES.  And then magically…

There was felt.

A  little more rolling and soapy water for good measure, and then, with a few snips, there were boots.
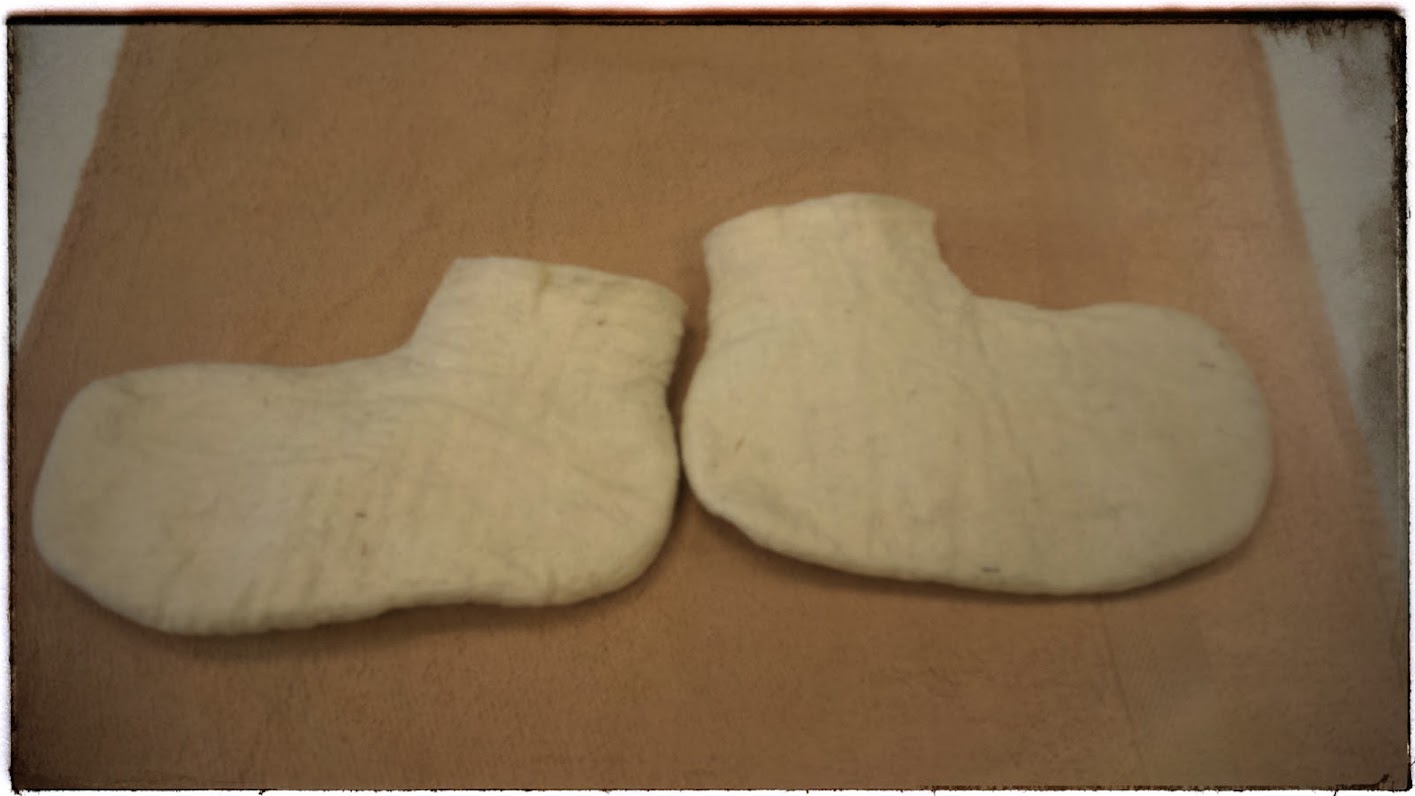
You can already see that my boots had a little more going on up in the toe region than they should have.  After the resist was removed and the ankle seam snipped (I made mine too narrow to put on without a snip), the final step was to put the boots on and finish the felting.  The last bit of felting is what does the final shrinking and shaping to the foot, and this is done while wearing them.  So, the flat shape becomes a three dimensional shape.  And since mine had Birky toe, they looked pretty funny when I put them on.  In the picture below, you can see all the extra material gathered into a flap.
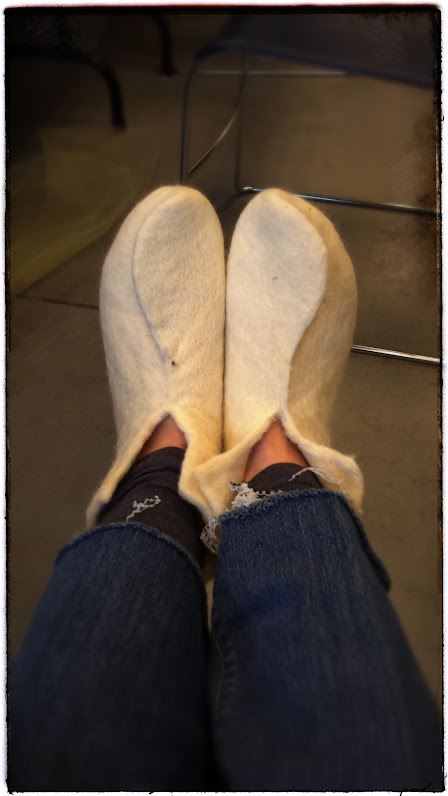
I debated about just cutting it off and seaming up the toe like this, but then while playing around with it, I pulled the flaps over and realized that it was actually a kind of a neat design element.  It was a fun and quirky class, and I made a pair of fun and quirky boots.  They fit, too.
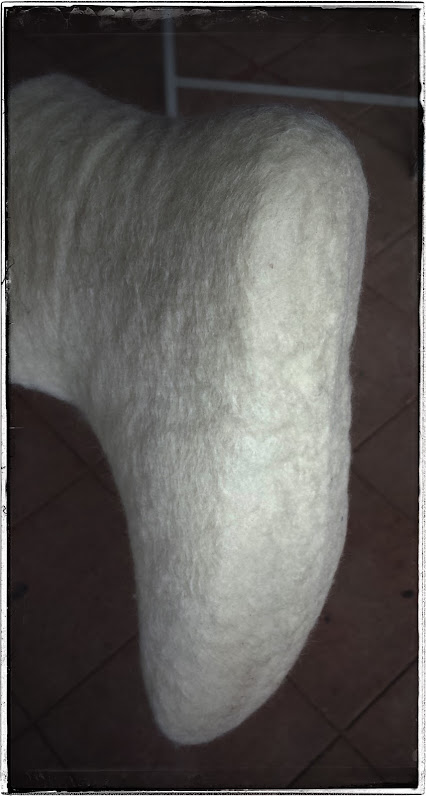
My teacher had a great idea to tack them down with buttons, and so I picked up some cute buttons in the market at the retreat.  I haven’t stitched them on yet—been waiting for the felt to dry—but here’s what it will look like:

I’m tossing around the idea of adding some needle-felted designs to the boots.  E loaned me her needle-felting needles to play with.  I’ve never done that before either. Or I might try my hand at some crewel embroidery.  I’ll show you when I finish them up.

So, a great weekend was had with nice people, great teachers, fun classes, and happy accidents.  All good things.  It was a nice jump start into crafty creativity again after  a year of still hands.  And, the best part is that I learned that there are more of these little (and not so little) local fiber and craft workshops all year long, many of which only charge nominal registration and class fees.  I’m looking forward to more.

At the Burrow DyeTable # 8: Pokeweed Racemes, Take 3

Here is the third and final installment of this first round of pokeweed raceme dye experiments.  I think the racemes are so beautiful.  I’d say “otherworldly”, but it’s hard to think that of anything born out of Missouri Ozark clay and rock.

Dye Notes:

Dyestuff:  Pokeweed (phytolacca americana)

Parts used:  The racemes (the part that holds the berries)

Source:  My yard, the Haggencrone’s yard, my friend Debbie’s yard, and the Farm

Yarn:  Mountain Meadow Cody, 100% wool.  I mordanted a little differently this time, opting not to follow any instructions other than those given by the seat of my pants.  I decided to use more vinegar, and pretty much did a 1:3 ratio of white distilled vinegar to water.  The reason for this is that in lieu of using straight acetic acid, I’m hoping the higher acid content will help with the fastness of this dye.  So I soaked 100g of wool yarn in a pot of 1/4 vinegar to 3/4 water.  I heated the pot to 190F and held it there for an hour.  Then I let the yarn sit and cool in the mordant bath overnight.  The starting pH at room temperature was 3.1.  At 188.2F, it was 3.0.

Ratio of dyestuff to fiber:  I only used half of the yarn I mordanted for this particular dyebath, so 50g total.  I’m not sure of the exact amount of racemes.  I didn’t weigh them out, as this was done on a whim.  But I can tell you that when I pulled them all from the bucket, they easily weighed a pound.   I’m sure most of that was the vinegar that they absorbed., so I’m going to say maybe 100g starting weight, and next time I promise to weigh them out.

Extraction:   Chucked the racemes into a bucket and covered them in white distilled vinegar.  Put a plate on top to hold them down.  Left them on their own for a couple months.   As you can see, these didn’t leach out the way the other ones did.  I think had I put much more vinegar in, they would have.  They were pretty compacted in this bucket.

Dyebath:  After the recent success with the cold pokeberry dyebath, I knew that I had to try a cold raceme dyebath, too.  I strained out the racemes through a colander and reserved half of the liquid for the cold dyejar (the other half was used for the hot dyebath).  I added the premordanted yarn and brought the dyejar inside the house, because I was afraid it might freeze and crack if left outside.  I kept it covered with black cloth (actually, just a black shirt—sorry if that is less poetic) to block out the sunlight.  The yarn sat undisturbed for 9 days.

The results?

WOOT!!!  Slam dunk and SCORE!  Cold dyeing with poke is the way to go.

Here is a picture of all 3 pokeweed raceme experiments together:

Fascinating, don’t you think?  That such totally different colours could come from the same plant, the same part of that plant, on the same yarn, and with the same mordant—just because of a difference in the specific dyebath process.  Very cool.  So does anyone want to hazard a guess as to why the cold process put the red on the wool when the heated baths didn’t?  Next I’ll put samples from these 3 up for a lightfastness test.  Will be interesting.  Here’s to curiousity and experimentation!

Live happy, dye happy!

At the Burrow DyeTable # 8: Pokeweed Racemes, Take 2

You have seen the results of the first pokeweed raceme experiment, but that is not all that has been cooking!  Unbeknowst to you, I have been extracting a second bucket of pokeweed racemes!   :D  How cool is that?  Mas racemes.  Pretty fun.

Dye Notes:

Dyestuff:  Pokeweed (phytolacca americana)

Parts used:  The racemes (the part that holds the berries)

Source:  My yard, the Haggencrone’s yard, my friend Debbie’s yard, and the Farm

Yarn:  Mountain Meadows Cody, 100% wool.  I mordanted a little differently this time, opting not to follow any instructions other than those given by the seat of my pants.  I decided to use more vinegar than used in the vinegar mordant for the pokeberry dyebaths, and pretty much did a 1:3 ratio of white distilled vinegar to water.  The reason for this is that in lieu of using straight acetic acid, I’m hoping the higher acid content will help with the fastness of this dye.  So I soaked 100g of wool yarn in a pot of 1/4 vinegar to 3/4 water.  I heated the pot to 190F and held it there for an hour.  Then I let the yarn sit and cool in the mordant bath overnight.  The starting pH at room temperature was 3.1.  At 188.2F, it was 3.0.

Ratio of dyestuff to fiber:  I only used half of the yarn I mordanted for this particular dyebath, so 50g total.  I’m not sure of the exact amount of racemes.  I didn’t weigh them out, as this was done on a whim.  But I can tell you that when I pulled them all from the bucket, they easily weighed a pound.  But I’m sure most of that was the vinegar that they absorbed.  I’m going to say maybe 100g starting weight, and next time I promise to weigh them out.

Extraction:   Chucked the racemes into a bucket and covered them in white distilled vinegar.  Put a plate on top to hold them down.  Left them for a couple months.   As you can see, these didn’t leach out the way the other ones did.  I think that had I put more vinegar in, they would have.  They were pretty compacted in this bucket.

Dyebath:  I strained out the racemes and reserved the dye liquor, pouring it into the dyepot.  To this I added the remains of the mordanting bath.  The starting pH of the dyebath was 3.5.  I gently raised the temperature to a window between 175-195F.  At temperature, the pH was 3.2.  I held the bath in this temperature window for 2 hours and then let the yarn cool in the pot overnight.

The results?

Again, unexpected.  This time we had a much higher dyestuff to fiber ratio, but we still didn’t get the red that they dyebath seemed to promise.  Why?  I’m not sure.  I think it could be one of several things.  1)  Perhaps although the bath looks red, there really isn’t enough of that compound in it to dye the yarn?  2)  Although the dyebath never boiled, perhaps it would have preferred to stay under 190F?  Even the next morning, when I took the yarn out, the bath was still full of colour.  It just wasn’t on the yarn.  Will have to play with this more…  Anyway, I think it’s a lovely soft yellow ochre, and I’m sure I’ll find something nice to knit with it.

Here you can see it next to the all-in-one raceme skein from the day before.  I am surprised that the slight difference in dye methods yielded such different tones.  Or was it something inherent in that first batch of racemes collected earlier?  Could it be due to the complete leaching of those first racemes?  I’m not sure.  Two nice colours, I think, though.  I’m eager to see how their lightfastness test turns out…

Live happy, dye happy!

At the Burrow DyeTable # Six: Poke for Pia

My fiber friend, Pia, asked me to do a little experiment for her.  She asked me to do a cold dye process with the pokeberries.  And so I did.  After all, far be it from me to ignore an opportunity to experiment, to leave our curiousity hanging.  Thank you, Pia, for your request.  I would not have thought to run a cold dyebath with pokeberries.

Dye Notes:

Dyestuff:  Pokeweed (phytolacca americana)

Parts used:  The berries

Source:  My yard, the Haggencrone’s yard, a friend’s yard, and the farm

Yarn:  Mountain Meadows Cody mordanted in vinegar as per the instructions in Harvesting Color by Rebecca Burgess.

Ratio of dyestuff to fiber:  No clue.  These were some of the pokeberries preserved in vinegar that wouldn’t fit in the original poke dyepot.  So I left them in a Mason jar.  I’d guess maybe 200g of berries.  Maybe more, maybe less.  Hard to tell.  The little mini-skein of yarn weighs 6g.

Extraction:  Mashed the berries in white distilled vinegar and left them for a month out of the sunlight.

Dyebath:  Cold dyed in a Mason jar.  No sunlight.  Nine days.

The results?

The top of the dye liquid formed a white film.  Some kind of funk.  It didn’t really smell bad, though, nor did it seem to effect the colour below.  The funk rinsed off easily and didn’t seem to do anything negative to the yarn.

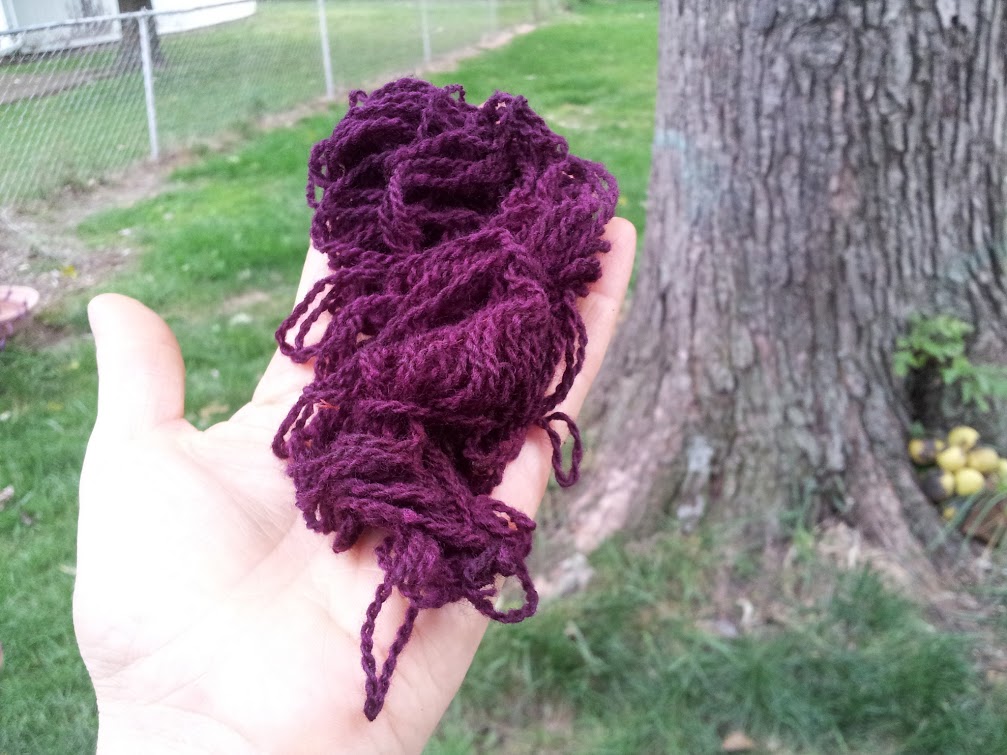
  Boy, is this yarn purple.  I mean PURPLE, like whoa.

It only got a little bit lighter with rinsing in plain tapwater.  It is a gorgeous colour.  And I am thankful to Pia for asking me to do this little experiment so that I could learn about yet another colour from the poke’s most unredundant bounty.

This is my favourite yet.

We’ll see if the colour lasts.  If so, this is my new go-to way to dye with pokeberries, hands down.  Pia, I hope you are happy with the pokeberry results, too.  :D

Live happy, dye happy!

At the Burrow DyeTable # 2: Long, Long Pot of Poke

My friend Laura came over to share in the fun of this dyepot.  I figured, while it’s still giving, might as well keep sharing.  She opted to bring some superwash skeins, which is cool, because I was curious how they’d take up the dye.   For the second exhaust bath, I opted to follow the exact same procedure as in the first dyebath with one exception:  After the 2 hour simmer, I left the skeins in the dyebath—for 2 days.   I thought it might help with fastness since the amount of dye in the pot is lessening with each exhaust.  During this time, the weather went from 80-some degrees to 30-some degrees!  Way to go, crazyass Missouri weather.  Pulling those skeins out of the dyebath was cold!  I let them hang out in the chilly air for several hours, and then I brought them inside to rinse.  For all of these pokeberry dyepots, I rinsed in a bucket of water with a dash of vinegar because my water is alkaline at pH 8.8, and I was afraid of that effecting the colour.  No soap or even Soak or Eucalan.  Rinsed until the water ran clear (or I ran out of patience).

Here are the results from the second exhaust bath (which is the third overall use of this dyepot):  Notice how much darker the two skeins on the left are.  They are both superwash.  The third skein over is a mohair boucle, and the rightermost (yeah, i just said that) is more Mountain Meadows Cody wool.  That boucle’s got some shine on it.  On a technical note, it’s really hard to photograph these colours accurately.  I’ve tried to get them as true as possible, but it took some doing.

And here is the line-up of all the pokeberry dyepot results so far.  From left to right you have:  Original dyepot, 1st exhaust, 2nd exhaust superwash, and 2nd exhaust wool.

I think that it’s interesting that we’ve moved from plums and raspberries to peachy-salmon tones.  I expected the colours to stay more in the same colour family and to just get lighter and lighter.  I did not expect it to jump to a totally different hue.  Now I’m wondering what I’ll do with them.  Oh, no!  I’ve got to look at patterns!  Lolz.  I’ve got to prepare for a kid’s class that I’m teaching on Wednesday, and I need my pot back.  But I’m tempted to do just one more before I let this one go.  We’ll see.  Until then,

Live happy, dye happy!

At the Burrow DyeTable # Two: Harvest Moon Dyeing

When better to dye with the bounty of a late summer harvest than under the harvest moon?   Saturday night I stayed up until the wee hours of the morning dyeing more yarn in the first exhaust of the pokeberry dyebath.   Ronin and the full moon kept me company.  We’re going to see just how much colour we can get out of this pot.

Dye Notes:

All of the dye notes for this first bath are identical in method to the first pokeberry dyebath.  The only notable exceptions are the following:

Yarn:  I used both Paradise Fibers 4-ply undyed wool and Mountain Meadow Cody.  Both were mordanted in vinegar as before, only this time because I was dyeing 250g fiber, I used 1.5 c. of distilled white vinegar.

Ratio of dyestuff to fiber:  I left the dyepot exactly as it was the night before, which means that it still had the 2800g pantyhose bag of pokeberries in it.  At this weight of fiber, our ratio is now only roughly 11:1, and that does not take into account that it is an exhaust bath which means a substantial amount of dye has already been used out of it.  So the actual ratio is incalculable.  By me anyway.

Dyebath:  The only difference with how I did this dyebath is that I paid closer attention to how much heat I actually had to give it to keep the temperature in the 160-180F range.  It was surprisingly little.  I brought the temp of the dyebath up while I mordanted the yarn in the vinegar/water.  Once the yarn was transferred to the dyebath, I kept a timer counting down 15 minute intervals.  From 180F, with no heat on the burner, it only lost maybe 3 or 4 degrees in 15 minutes.  So basically, I just fired up the campstove for 1 minute every 15 minutes to keep the temperature between 175-180F.  The rest of the time it was off.  This save SO MUCH propane.   Once it was up to temp, I only turned the stove on for 8 minutes in 2 hours.  And it allowed me to not have to worry about the pot overheating.  Instead I enjoyed the quiet of 2am and knit on my EarthSea socks.

After the 2 hour dyebath, I left the skeins in the pot to cool until morning—about 6 hours—and then hung them up to dry in the shade.  This time in the dyebath is about half of what the first skeins had.  This was not intentional, just the way my day dictated.

Then my friends Hollie and Patrick and I went to the Strange Folk Festival to check out all the crafts.  My friend E was there helping Martha with the baskets at her booth.  I wish I’d had my camera with me, because her booth and the baskets and carved gourds were gorgeous.  So inspiring.  E and I are planning to do a hickory stool workshop with Martha in the spring when the hickory bark is ready to harvest.  Am so excite!  After the festival, we came back to rinse the skeins—so they were hanging for about 7 hours.  They rinsed clean after only a few water changes.  They are slightly but noticeably lighter than what came out of the first dyebath.

Here are skeins from the original dyebath and the first exhaust bath together so you can see the difference.  We went from damson to raspberry.

I’ll be writing about the second exhaust bath in the next couple days.  I’m really interested to see how the reduction of dyestuff to fiber effects fastness.  I’m hoping these colours stick around for a long time.  I think they’re gorgeous.

Live happy, dye happy!

At the Burrow DyeTable # Two: A Little Poke in the Night

Oh, my friends, have I been harvesting poke.  I’ve been harvesting poke for weeks.  Over hill, over dale, thorough bush, thorough brier, over park, over pale, thorough flood, thorough fire, I do wander everywhere… collecting all the pokeberries I can find.  Well, not all of them.  I left plenty for the songbirds.  Husband lent a handsome hand, as well, because he is all things good.  Happily, despite the drought this summer, there is many much poke.  It is glorious.

And for what do I gather these succulent little berries that cling in clusters on their pendulous racemes?  For dyeing, of course.  To make that dyer’s alchemy happen—to pull colour from one to put upon another.  Transference.  The dictionary defines alchemy as “any magical power or process of transmuting a common substance, usually of little value, into a substance of great value.”  If turning the often (but wrongly) despised pokeweed into gorgeous dye doesn’t qualify as alchemy, I don’t know what does.  Chemistry, science, botany, magic.  I sing songs of the poke while I play with my temperature probe and pH meter.  All business on the outside, all earthy poetry on the inside.  It’s how I roll.

My friends, E and Hollie, came out to play in the dyeworks last night, bringing yarn and knitting and good company.  We all worked together to mordant our yarn and get the dyebath ready.    We worked well until midnight to perfect our dyepot.  Thanks to Hollie for taking notes.  :D

We used the dye recipe from Rebecca Burgess in the beautiful book Harvesting Color.  She says that this recipe came from dyer Carol Leigh from Columbia, Missouri, who devised a way to make pokeberry dye lightfast.  It is important to note, however, that the instructions for pokeberry dyeing on Carol Leigh’s own website are rather different than what is found in Harvesting Color.  I am not certain as to the reason for the differences—maybe it’s an older set of instructions?  The instructions in Harvesting Color are a bit more user-friendly in that they require less time and use vinegar, which is readily available.  But the instructions on Carol’s site seem more definite in their ability to give lightfastness.  All I know is that now I’m curious to try them both to compare.

Dye Notes:

Dyestuff:  Pokeweed (Phytolacca americana)

Parts used:  The berries

Source:  My yard, the Haggencrone’s yard, a friend’s yard, and the farm

Ratio of dyestuff to fiber:  We used a ratio of 20:1 berries to wool.  We had approximately 2800-2900g of pokeberries and 150g of wool.  Burgess calls for a 25:1 ratio, but at the end we decided to add just a little more wool because it was sitting there staring at us, just begging to be put in the pot.  Far be it from me to ignore wool.

Yarn:  The yarn that I used was Paradise Fibers 4-ply undyed wool yarn mordanted in vinegar as per the instructions in Harvesting Color.  For 150g of yarn, we used 3/4 c. of distilled white vinegar in enough water to cover the yarn.  The pH of the mordant bath was 3.1, and after we brought it up to temperature (160-180F), we held it within that temperature window for 1 hour.  I won’t say simmered, because it never bubbled.  It was very gentle.  It mostly stayed around 175F.  We also put a piece a ceramic in the pot to hold the yarn up off the bottom so that it wouldn’t scorch or felt.  Dyeing on a campstove with limited controls can be tricky.  It’s a delicate dance of turning on the heat, bringing up the temperature, and then tossing a lid on the pot and turning off the heat to maintain the temperature without it getting to a boil.  Fun times.

Extraction Method:  Since I started collecting berries over a month ago, I had to come up with a way to keep them from molding or going bad before I could use them.  This is one case where drying won’t work.  Apparently, even using the pruned berries off the plants will make your dye go toward brown.  So I only used the plump berries for this bath.  I didn’t have room in my freezer for them either (and I did NOT want them sitting next to the blueberries the kids use for smoothies).  I had to come up with something different.  So, after I picked them, I took them off the racemes, placed them in a jar, and covered them in vinegar.  I figured that since the dyebath requires vinegar anyway, it wouldn’t hurt to preserve the berries in vinegar.  I haven’t heard of anyone else doing this, but it seemed to work just fine.  Better than fine, actually.  (Update 10.5.12:  I’ve been digging around on the natural dyeing forums on Ravelry and found a few references to people saving their pokeberries in vinegar until they need them.  Like minds, and all that.  :D  I’ve also read about some people dyeing with pokeberries in pure vinegar instead of vinegar in water.  I was wondering about this, too, and would like to try it!)

I read about different ways of straining the pokeberries and tiny black seeds out of the extraction bath, but they all sounded kind of like a pain in the ass.  So we filled a leg of pantyhose with the berries and tied it off.  This worked fantastically well.   Kept all of the little seeds and smushed berries out of the yarn. To make filling the hose easier, we took the ring lid of a large Mason jar and threaded the neck of the pantyhose up through and around the ring to hold it open.  That made feeding berries into the pantyhose a piece of cake.  Then we tied off the top of the pantyhose and squeezed the berries to thoroughly mash them.  It looked like something out of a voodoo ritual.

The berry bag, and the residual vinegar from the preserving (about 3 cups), was added to a large stockpot full of water.  We added a bit more vinegar to lower the pH to 3.7.  Burgess says a pH of 3.5 is good for the dyebath, but we couldn’t get the pH to budge despite adding 2 more cups of vinegar.  So we called it good.    At the same time we were heating the mordant bath, we heated the berry extraction bath on the other burner.  We slowly brought this up to the temperature window of 160-180F, and then we held it there for an hour.  No simmering, no bubbles.  Gentle, gentle.

Dyebath:    Since our pantyhose bag worked so well to contain the particulate, we decided to keep the bag of berries in the dyebath, too.  This is a divergence from all the pokeberry recipes I’ve seen, although I’m really not sure why taking the dyestuff out of the bath is recommended.   We didn’t want to risk uneven dyeing due to the yarn resting directly against the bag, and we also wanted to avoid any scorching or felting of the wool from touching the bottom of the pot (this happened to a couple spots on one of my skeins from Dye Day #1).   So I had the idea to put the bag of berries on the bottom of the pot and cover it with an inverted wire mesh colander.  This held the yarn up away from the dyebag and where the heat would be more even.   Seemed to work great.

We held the temperature of the bath between 160-180F for 2 hours.   At temperature, the pH of the dyebath was a perfect 3.5.

After 2 hours, I turned off the heat and put the dyepot to bed, letting the yarn cool in the bath overnight.

The Results…

After a 12 hour sleep overnight in the dyebath , the skeins were removed by hand, and the excess dye was gently squeezed out.  Fresh pokeberries will temporarily stain your skin, but the dye is so water soluble that you don’t even need soap to wash it off.  Dyebath poke, however, after being acidified and stewed, is another matter entirely.  It will stain your hands.  I hope this shift in fastness is a sign of good things to come.  By the way, I’ve read that absorption of poke juice through the skin is a good lymph detoxifier.  Interesting, yes?  I know that poke root works this way, but I’ve only read one reference of it with the dye.  No idea if it’s true, but I suffered no ill effects from having it on my hands so much.

Here is the yarn out of the dyepot but before rinsing.  It is recommended that you leave them to hang in the shade for at least 20 minutes to half a day before rinsing out the excess dye.  My day got away from me, what with ferrying the Chickpeas around town and working on the kitchen floor.  So these hung for 24 hours.

Wowzers, right?  And there is still so much colour left in the dyebath it’s ridiculous.

And here is the yarn rinsed, dried, and reskeined.  You’ll notice little pink flecks in one of the skeins—that is from some resist experiments I did.  I tied off the skein in several places to see what kind of pattern it would make.  I’m pretty happy with this deep, deep plum colour from the first dyebath.

There are more posts to come about the adventures in pokeberry dye.  So many exhaust baths…  And lightfastness tests are underway.  Until then:

Here’s to good friends, good wool, and good plants.

Live happy, dye happy!

Volunteers

I don’t know a lot about plants.   I mean, I took botany in college as a requirement for my then bio major, but I don’t have that deep-seated intimate knowledge of plants that some people do.   I do ok growing them.  Houseplants and I get along so-so, usually better if I ignore them most of the time.   I garden better in the country than I do in the city.  The way I see it,  successful gardening has a lot more to do with the plants’ tenacity and will to live and propagate than it does with me having a green thumb.   My thumbs are just ordinary thumbs after all.

Japanese Knotweed

But plants fascinate me.  I love them.  Which is why I am trying to be a better gardener.    But it wasn’t the desire to grow more vegetables that sparked this love, nor was it a blossoming need to fill flower beds (see what I did there?), although both of those things are true.   It was weeds.  Well, truthfully, it was one particular weed that made me start looking around at the fascinating world volunteering their growth all around us:  Polygonum cuspidatum.  This plant was growing in our yard when we moved in to our house 7 years ago.  Didn’t know what it was. It looks like bamboo, and the bees are crazy about the flowers.  Swarms of bees.  So many bees, in fact, that the kids had a hard time playing in the back yard where this plant had absolutely taken over a 30ft section of fence.   So I took a sample of it to the Missouri Botanical Garden for an ID.   Japanese knotweed, they said.  Invasive.  Get rid of it!   So I did.

At least I thought I did.  Because the next year, it was back.  This time instead of pulling it, I dug it up.  All the roots I could find.   But the next year, it came back again.  Turns out that ANY little knob of root left in the ground will sprout.  And it didn’t help that two of my neighbors let it grow all along their fence-line.  So this time I dug, removed roots, and put down weed barrier.  Well, all I had was newspaper, but I laid down a ridiculously thick layer of it all along the back fence, and then recovered it will soil.  And this seemed to work.  For a while.   The polygonum is back, but in pull-able amounts.   And in the seven years that I’ve been battling the polygonum, I’ve had a change of heart.  I’ve decided that I just can’t hate a plant that is so damned determined to grow.   So, I give it a little space now—just a little—and keep it from choking out the rest of the garden.  We have a tentative truce.  Not enough for me to take pictures of it, though.

Lady’s Thumb

My relationship with other weeds is much friendlier.   After I learned about the polygonum, I started looking around at all the other plants growing in my yard.  Part of this, I think, was just the newness of owning my own patch of land for the first time, which meant that every plant was potentially precious just by virtue of it growing on my soil.   One of the first I noticed was this little sweetie:

I think this is Polygonum pensylvanicum

As best as I can tell, it is polygonum pensylvanicum (used to be classified as a persicaria), also known as smartweed and lady’s thumb among others.  Most consider this a very invasive weed.   It is really quite lovely, however.  It braves the intense heat of the summer without withering, and it blooms for a very long time.  It’s also pretty easy to control by mowing.  So we let it grow in mounds in places where it seems happy and where other things are more reluctant to grow—like things I intentionally plant.   This plant is native to North America, and I found information suggesting that it was used medicinally by various tribes for diarrhea and hemorrhages.   Some species are said to be edible, although they are reported to be very, very peppery.   I have no desire to eat them, but I find this kind of information interesting.

Creeping Charlie

Another beautiful plant that likes to grow in my yard is creeping charlie.  It’s probably my favorite volunteer because of the gorgeous ground cover that it provides year after year under the trees and bushes I planted at the back of the yard (formerly Japanese knotweed territory).   It is most beautiful in  spring when it is in full bloom, although the greenery stays pretty lush for most of the year, dying back only after a deep frost has occurred.  It tolerates the whole summer without ever being watered.   It is easily manicured into a border by mowing.   Creeping charlie has medicinal uses and has also historically been used for some culinary purposes, although the safety of this is disputed.   Again, I don’t want to eat it, I’m just happy that it volunteered itself as ground cover around my back tree garden.

creeping charlie

This is a picture of the area where it is now growing with abandon.   I linked because the tags are helpful.   In this picture,  all these trees and shrubs are only a year old in the ground, and the creeping charlie is just clustered around the base of each.  Now it has spread across the entirety of the back fenceline in a lush, deep ground cover.  I’ll have to get a good picture of it next spring.   It’s really pretty.  I’d take a picture of how it looks now, but my camera is borked, and the phone camera is just barely getting me by—by which I mean that every time I take a picture with it, I want to throw it against the wall.  I miss my camera.    Here is a patch of it, though.

creeping charlie = great ground cover

Pokeweed

Pokeweed.  Pokeberry.  Poke.  Phytolacca americana.  It grows all over the farm where I grew up in the Ozarks, and I’ve always loved it’s magenta-stemmed and purple-berried gorgeousness.   I remember the first time I  really noticed this plant.  I was maybe 14 years old and was out riding fence with my dad.  We came out of the woods and into one of the upper pastures, and I saw this giant magenta plant full of long clusters of purple-black berries.  It had to have been 7 feet tall, and the stem was very thick.  It looked like something from an alien planet—far too exotic for some farm in Southeast Missouri.   But no, it was just poke.   I was taught that it’s poisonous, and it wasn’t until I got married and was blessed with the chance to meet my husband’s wise and wonderful Gran that I learned that in many parts of southern Missouri (and indeed the South), it is eaten as “poke salat”.   Gran says that she was sent out as a child to pick the young, tender leaves to cook.   Still, it is regarded as a highly toxic plant, regardless of how many people grew up eating it every spring.   Poke is apparently also being researched medicinal use for both AIDS and cancer.  Way to go, poke!

Poke has only chosen a few places in my yard to grow.  Here we’ve got a beautiful specimen of pokeweed growing up beside the compost pile.

Pokeweed, soon I will dye with you!

I am more comfortable with the greens from my garden or from the local farmer’s market to bother eating the poke growing in my yard.  No, I’ve got a far better purpose for it in mind:  dyeing yarn.    Using the berries to create the dyebath produces the same gorgeous magenta colour as found on the stems of the plant.   For a long time, it was not considered a fast dye (meaning that it either washes out or bleaches quickly in the sun).  But a local dyer named Carol Leigh developed a way to make the dye fast by mordanting the fiber in vinegar.  I discovered this in the very awesome book Harvesting Color by Rebecca Burgess, who studied with Leigh when researching recipes for the book.  Now I cannot wait to try it this fall!  It takes a lot of berries, so I’ll be harvesting at the Farm, too.

Dandelion

One of the most abundant and welcome volunteers in my yard is the noble dandelion.  You can make wine, tea, salad, medicine, and dye all with this one weed.   I say weed only because of the number of people who try to eradicate dandelions from their yards.  They know not what they do.   Dandelions make me smile.  I happily give them all the space they want to grow.

i love dandelions

Violets

Then there is the wonderful violet.  Often overlooked, but this is a mistake.  Violets will grow like nobody’s business if you just give them a chance.  They are edible and medicinal and generally a lovely plant to have around.  Right now I’ve got violets growing for me in pots, in all of my garden beds, around my roses, and in my yard.  All volunteers.  Anything that works so hard to grow so prettily deserves a spot in my garden.  I freely admit to talking to the violets.  We’re friends.

a big colony of violets in the west garden bed. gorgeous when they are blooming, and lovely ground cover the rest of the year.

That is all for now.  The rest of the volunteers will have to wait for Part 2.  I hope that this encourages you to take a closer look at all the cool weeds growing around you, and maybe think of ways of giving them space in your garden and in your life.   Taking the time to develop a more intimate awareness of  these plants has enriched my life.  It has helped me remember to be aware of what is right under my feet, and it keeps me from taking things for granted.

Post Navigation