Grackle & Sun

Archive for the tag “wool”

Wait for It….

I missed the lunar eclipse. Would not really have been able to see it from here anyway. So I slept.

And then I woke up, and during the course of my day, saw all these other wonderful things instead!

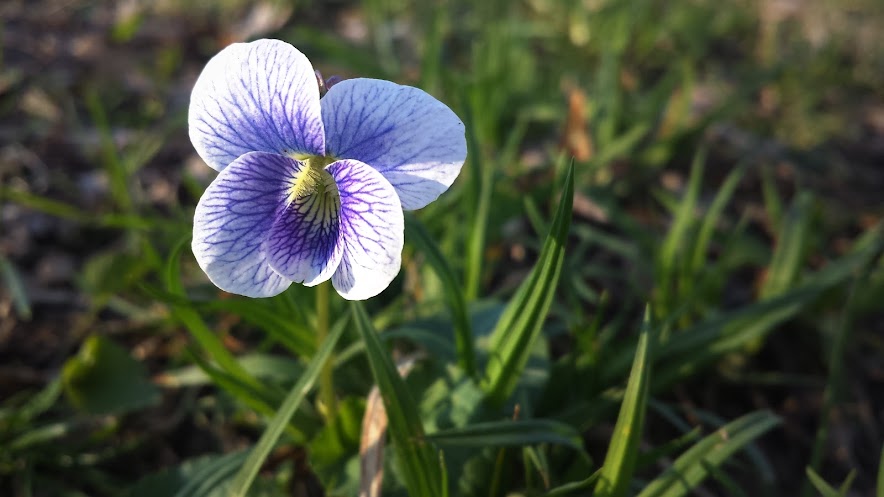
Overnight, all the violets in the world bloomed.

The woods behind my house full of Spring Beauty, Claytonia virginica.

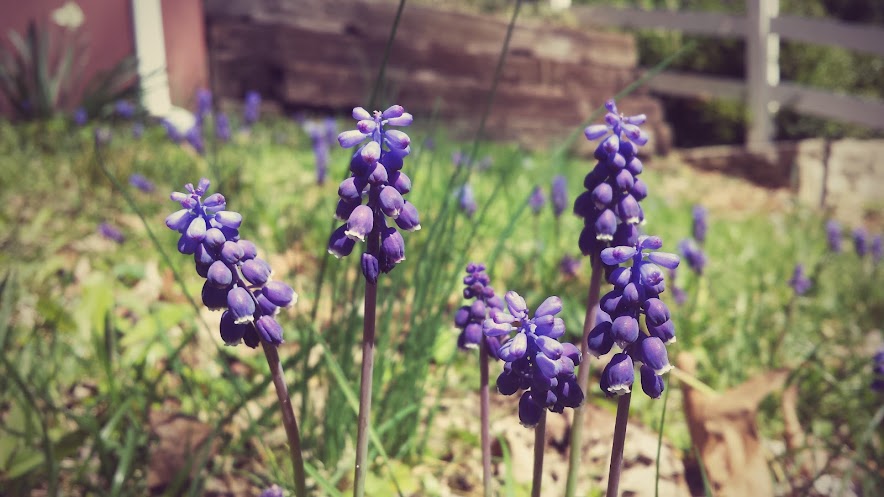
A miniature field of grape hyacinths, which smell absolutely divine–from a close distance.

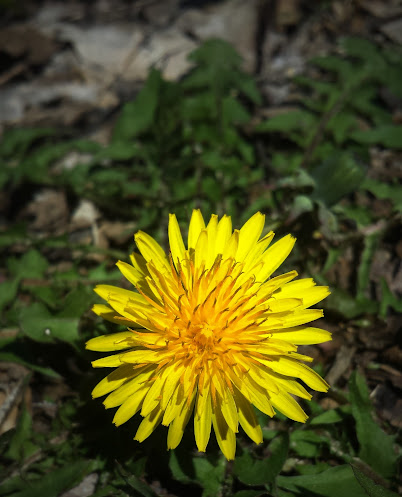
Always happy to see these sunny little lions.

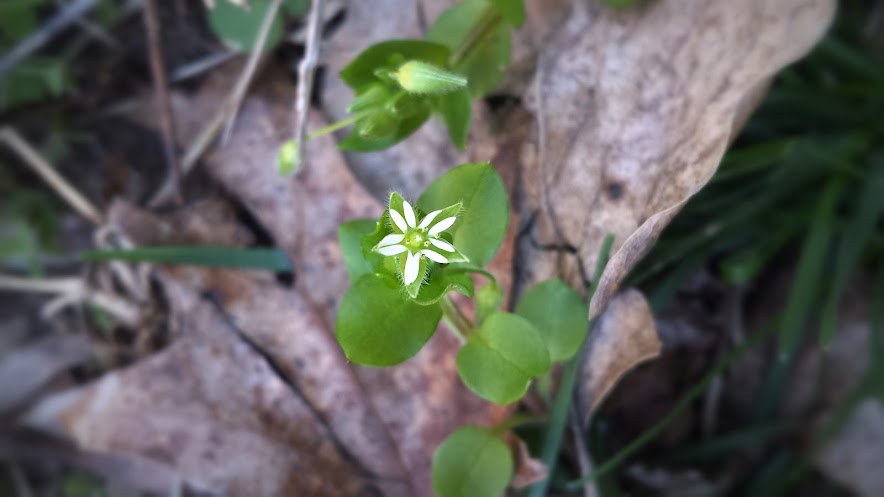
Chickweed, Stellaria media. Of course, not a weed at all, but a medicinal soother.

May…

Apples…

Un…

Furling.

Maybe this year I’ll get to taste one…

A nibble-on Trillium.

Native American fishing net plummets. Who knew? I did not.

Thank you, local Conservation Center!

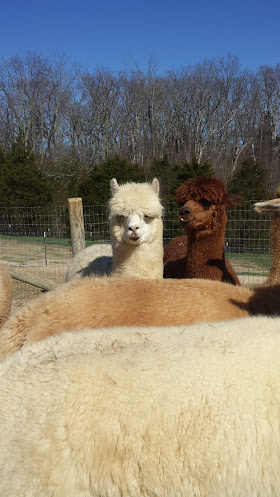
And, my friends, for the best part of the day.  I took a lovely afternoon drive–windows down, Bjork blasting her quirky Icelandic heart out on my speakers.  A drive which led to my knitting buddy’s alpaca farm. I feel that should be in all caps.

ALPACA FARM FIELD TRIP!

Aw, yeah. That’s right. All the fun enhappenated.

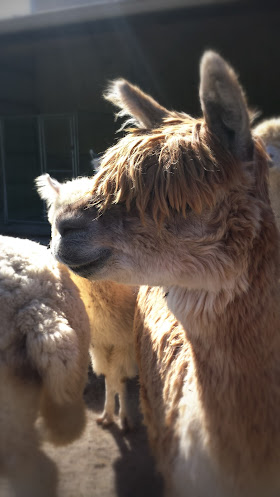
Oh, the squishy, springy, lustrous wonderfulness. I touched a lot of alpaca today.

 I got kissed by an alpaca. No joke. It’s how they say hi, things are cool. They have very soft noses. This is not the alpaca I bumped noses with. It’s hard to take a picture of an alpaca when her face is in your face, so Sweetums remains unseen.

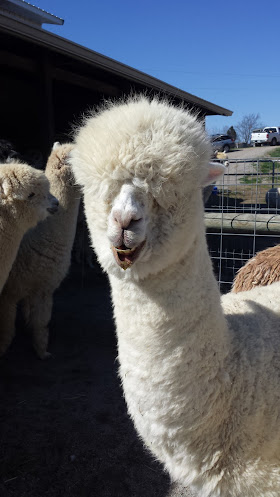
They will be shorn next week. Ready for the heat of a Missouri summer. Their teeth will be filed (as the photo above shows, it’s time) and their toes trimmed. All in 8 minutes per animal, so I’m told. Professional shearers know their stuff, hunh?

Look at that coat! Practically begging to be spun. I’ve never wanted a wheel as much as I did today. I’ve got to start spinning.

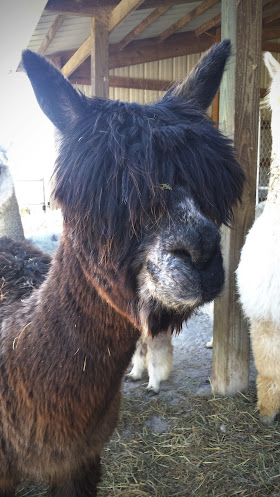
The biggest surprise to me was how stout alpaca are. They are muscley little things under all that gorgeous, sproingy wool.

They are also very curious and personable. Really delightful souls.

Alpaca. Best field trip ever.

Knit|tinK: Sweet Little Shawl

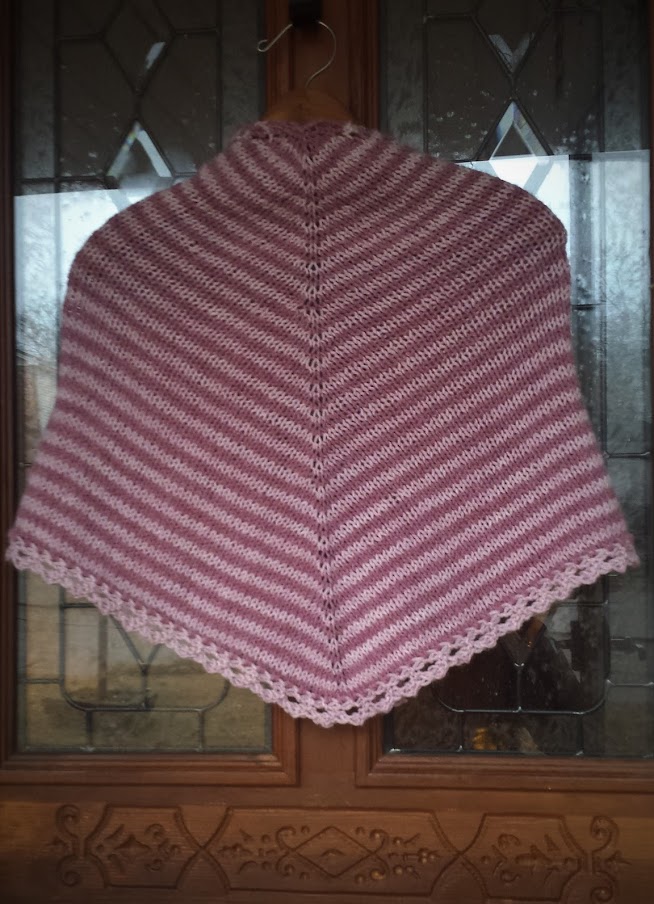
All that ranting and moaning about not being able to knit apparently unblocked my mojo. I decided the next day that I needed to cast on a quick little project for a gift I had promised a friend months ago. I found the perfect pattern in Susan Galbraith’s Sumptuous Stripes Shawlette.

The shawl is a gift for a teenage girl, and so I decided that making it easy to wash would be the kind thing to do. I used two skeins of my go-to favourite “I’m making this for a kid” yarn, which is Lion Brand Wool-Ease in worsted weight heathered solids. We all have our guilty knitting pleasures, and Wool-Ease is mine. It wears well, and you can chuck it into the washer and dryer many, many, many times, and it comes out looking like new. The natural-coloured Romney wool snob in me is stamping her foot in the corner. I am ignoring her.

This took all of two days to finish. I had fun learning how to knit on an edging, which somehow I had never done before. Susan was super helpful in answering my questions when I couldn’t quite visualize where I was in space and time. It all came together without a hitch. Well, almost. The Universe had a hand in this project, of course. See, the funny part about the whole thing is that in order to get the drape I was looking for, I had to go up in needles size. To size 11. So, two projects going on size 11s at the same time. Ha! That’s what I get for bitching.

The only other size 11 needles I had in the house were a pair of old aluminum straights. Not even all that straight–one has a bend in it either from use or maybe from being sat on… I was NOT going to buy another pair of circs in a size I abhor, and so I used the straights. I crammed all 199 stitches onto those cold, chubby, metal sticks, and I made it happen.

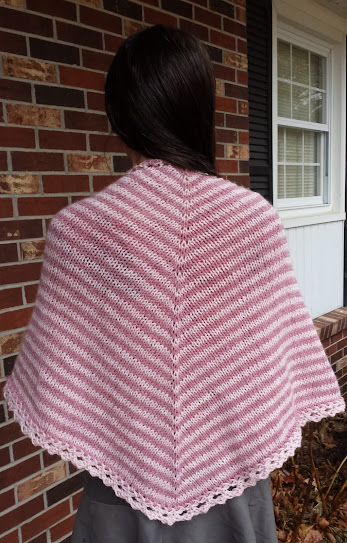
Turned out pretty cute.  Thanks to awesome teenage daughter who modeled for my “knit cred”.

I have a thing for knitting stripes. In part, it is due to my “stripe amnesia”–that’s what it’s called when you forget how horrible it is to weave in a millionty ends. BUT, this pattern had no end weaving whatsoever due to the very clever, yet simple, way the colours are carried and changed. I also love the way the edging took care of binding off the live stitches and helped the stockinette to lay down nice and flat. Lovely. Especially since the downfall of Wool-Ease is its lack of blockability.

There we go. Knitting success. Mojo unblocked. Needles flying like the wind.

Aaaaaand… I’m back to the afghan. :D

As always, tinks on me.

Knit|tinK: EarthSea Socks

These were a long time coming. Slow knitter, frequent tinker = Me. Remember when I dyed some sock yarn with black beans? I finally got that yarn knitted up into some socks. Took a while, because I played around with different construction, and ultimately changed needle size entirely. And, you know, I moved and they sat in a box for a while until I dug them out a couple weeks ago and started over again. Moving is bad for craftal expediency.

These socks were knit toe up on 2 circulars, two-at-a-time. I always begin toe-up socks with a Turkish cast-on. It is my favoritest ever—so easy to do and, most importantly, very easy to remember how to do. Mind like a sieve. Then I knit my standard Super Rounded Toe which goes something like this:

Part One:
After casting on a reasonable amount of stitches (I cast on 9 stitches per side for a total of 18 stitches, and I wear a US size 9 shoe), increase 4 stitches every row until 1/2 the number of needed increases are made. The increases are made at the beginning and end of each half of the sock—2 stitches on the instep and 2 stitches on the sole.

I do my increases like this:

Row one: K1, Inc, knit however many, Inc, K1 (repeat for second needle)
Row two: K3, Inc, knit however many, Inc, K3 (repeat for second needle)

Rinse, repeat.

EZ’s backward loop cast-on and the lifted increase both work very well. I did an EZ increase for the first set of increases and lifted increases after that.

Part Two: 
Increase in the same manner every other row until only 3 increase rows are needed.

Part Three: 
After last increase row from Part 2, knit 2 rows plain. Increase, then knit 3 rows plain. Increase, then knit 4 rows plain. Increase one last time. Then carry on with the sock.

This method works really well for making a nice rounded toe as opposed to the typical pointy toe that many sock recipes call for. Below you can see the difference between a standard toe and my Super Rounded Toe that I did for Dave’s Business Socks:

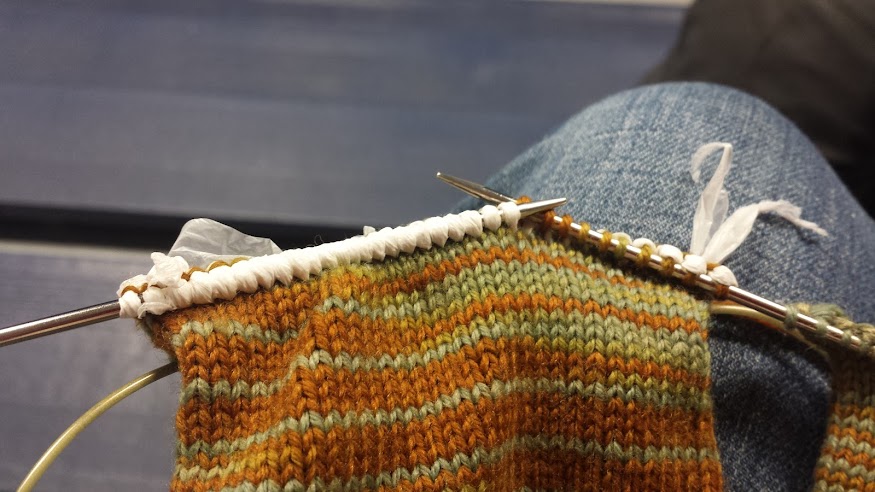
And then for some extra fun, I did something different for these socks that I’ve never tried before—I knit afterthought heels. It was convenient because I got to the heels while we were at a Comic Con with the kids, and I really didn’t want to stop knitting, which I would have had to do for any other heel type. Mind like a sieve, remember? However, I grossly underestimated the amount of waste yarn I’d need to mark my placement for the heels and had to improvise in order to survive. Not much yarn to be had at a Comic Con.  I did, however, find a plastic bag that someone left on a bench. So I ripped a long strip off of it, gave it some twist, and continued knitting merrily on my way. You do what you gotta do out in the wild.

A word about afterthought heels. EZ (Elizabeth Zimmermann, the Great and Powerful Oz) only gives an outline for how to do this method, requiring, as she does, for us to use our own brains. So I did some interweb research to try to find out more information as to avoid unnecessary and repeated tinkage. One can but try. In particular, I wanted to know exactly where the waste yarn (or for the very brave, the cutting!) should be placed. The interwebz proved very vague on this point. My inclination was to place the waste yarn in the same location where one would start a Sweet Tomato Heel–just before the ball of the heel directly below the crease where the ankle turns into the instep. I found one reference that agreed with this placement, and so I ran with it. Which was a good call, because it fit perfectly.

Then I knit up to the top, added some ribbing and finished with EZ’s sewn bind-off, which again, is my favoritest.

A note on the yarn at this point: Argh. It turns out that ammonia is a pretty harsh modifier. There was breakage within the skein, but only where I modified it with ammonia. Those are the greenish coloured sections. Clearly I applied it too strong for too long. Lesson learned. Because of the number of places where I had to piece the yarn back together (nothing crazy, but enough to be annoying), I don’t expect these to hold up too long.

After the bind off, went back and picked up the stitches on either side of the plastic bag waste yarn. Then I snipped and removed the waste yarn (easier said than done) and was left with the sole stitches (half of the total stitches) on two needles.

At this point, I had to experiment a little bit. In my reading about afterthought heels, one complaint I encountered was that the heel didn’t fit well—specifically, that it pulled too tight across the instep. My first thought for correcting this was to add some short rows in the corners on each side in order to add a bit more depth. I tried this, and while it added the needed depth, it also created a little puckery pocket on each side of the heel. Boooo! That was not attractive. Tink!

I fixed the problem by picking up additional stitches in each corner (4 on each side) and then knitting 5 rows plain before beginning the decreases for the heel. This worked beautifully. The afterthought heel is essentially a toe. Yup. You knit a toe where the heel is and, miracle of miracles, it fits.  After knitting 5 rows plain, I began decreasing 4 stitches every other row. Just like on the toe, these were done at each corner of each half of the sock, leaving a knit stitch worked at the end: K1, K2tog, knit however many, K2tog, K1. I did not do matched decreases, I just did K2tog. It works fine. When I got to the last few rows, I decreased every row until I had 9 stitches on each needle (18 total).

Then I committed the Kitchener Stitch.

Here are the finished socks:

I was skeptical about how the afterthought heels would fit, but they’re actually really comfortable. The only thing I don’t like about them is the impossible donkey ears of the Kitchener grafting. I worked the first two and last two stitches together to improve the issue, but it doesn’t entirely correct it.  See what I mean?

In the future, I think I’d try a star decrease pattern on the heel instead.

It was interesting to see how my haphazard over-dye job knit up on these socks. What is most curious is that one sock is quite a bit darker than the other. I want to learn more about dyeing for different striping patterns. More to play with. :D

As always, tinks on me. ;)  Tune in next time for some cute baby knits.


Knit|tinK: Parkour Handwarmers

I actually have been knitting. ;)  I whipped up these handwarmers for my son over the winter holiday break. He asked for a pair of handwarmers and had a few specific requirements for them—that they be grey, and fit a certain length on the fingers. We have the same size hands right now (yeah, my hands are the size of a 14 year old boy’s) so it was easy to measure as I knit along. They were a fun, quick knit and fit really well. Full notes are on my Ravelry page. While I made up the formula for the mitts from my very own brainz, the thumb increase was a pretty close interpretation of the gusset in Kim Christensen’s Garden Mitts. I used a different weight of yarn, and my gauge (and therefore my math) was totally different, which required me to rework her instructions somewhat. I also completely changed how the thumb was set in, just ’cause I was playing around with ideas. However, the basic gusset method is hers, and I think it’s awesome. Very clever.


I tink therefore I am. ;)


Fiber Retreat

This last weekend, I had the pleasure of attending a Fiber Retreat with a dear friend of mine, E.  You might remember E from our pokeberry dye fun.   We had a blast. Mad skillz, friendly people, and more homegrown fiber than you could shake a weaving stick at.  I think that was my favorite part of the whole weekend—meeting all of the local fiber farmers who set up in the market.  I believe in supporting local, sustainable, and small farmers, crafts-people, and artisans, and I love attending venues that focus on local rather than commercial goods.  Besides, small batch homegrown wool has so much character and life—once you’ve worked with it, you don’t want anything else.  The market was packed with luscious wool, alpaca, llama, and mohair.  It was also really cool to meet so many highly talented fiber artists from my state—many of whom live in small towns and out of the way places where the unsuspecting might be surprised to find such artistic genius.

I took three classes at the fiber retreat:  weaving sticks, continuous strand weaving, and wet felting.  Three things I have never done before.  The classes were lively, the teachers were wonderful.   So let’s go on a little photo journey of newly acquired craft knowledge:

Weaving Sticks
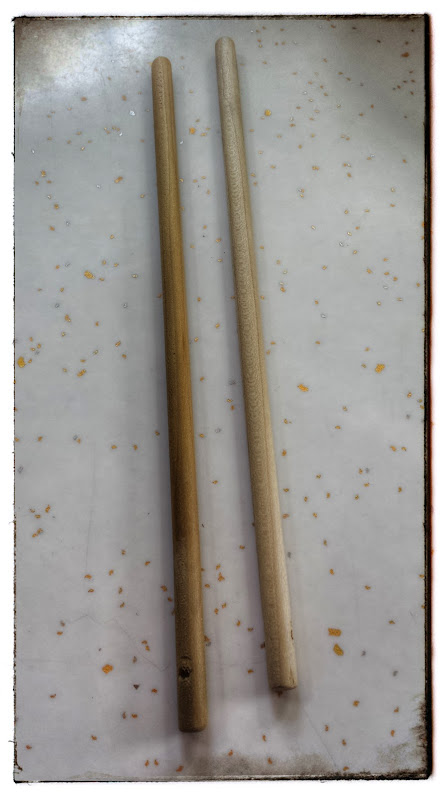
The history of stick weaving is not well defined online.  Some claim it was used by Native Americans, others that it was brought to Europe by the Crusaders, and yet others claim that it was actually developed as recently as the 1940’s.  However, I’ve seen no actual proof in any of these assertions—no references or photos of any kind, and it seems that the same information about the history of stick weaving is simply being passed around from site to site.  My thought, however, is that we know weaving has been around for many thousands of years, and this method is so simple that surely somebody somewhere used it.  In conclusion, I have no idea what the real history of stick weaving is.  If any of you weavers out there do, I’d love to know!

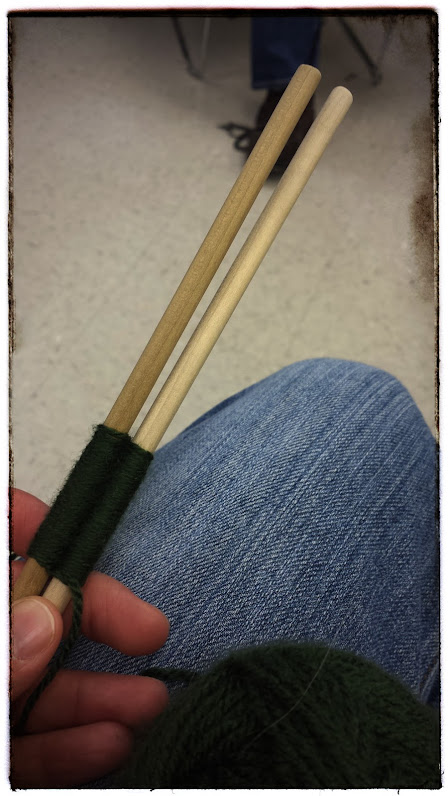
Stick weaving is a very simple form of weaving.  It is essentially the same process as weaving on a peg loom, only instead of the pegs being fixed, you hold them.  This can be done with as few as two sticks or as many as you can hold.  Each stick has an eye, and like a needle, is threaded with what will become the warp.  Our warp yarn was too thick to go through the stick holes, so an extra string was threaded through those to create a bigger loop that hung down below the stick.  You can this this in the photo below.
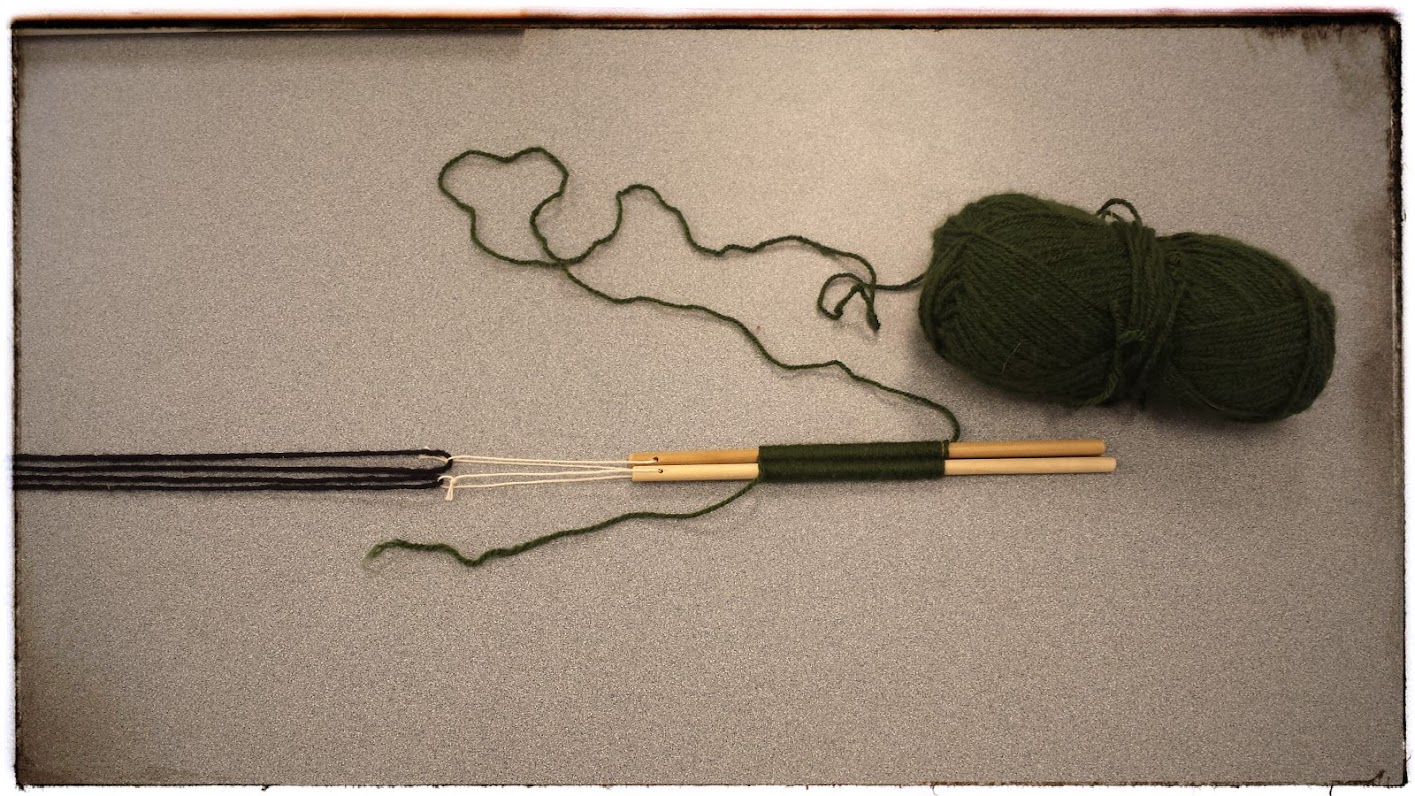
The the working yarn is woven in a figure eight (for two sticks) or a serpentine (for more than two sticks) fashion around the sticks.  This is the fun part.  It is very soothing.  Mindless and rhythmic.  As the weaving is done, it is pushed down on the stick to keep a nice even tension.
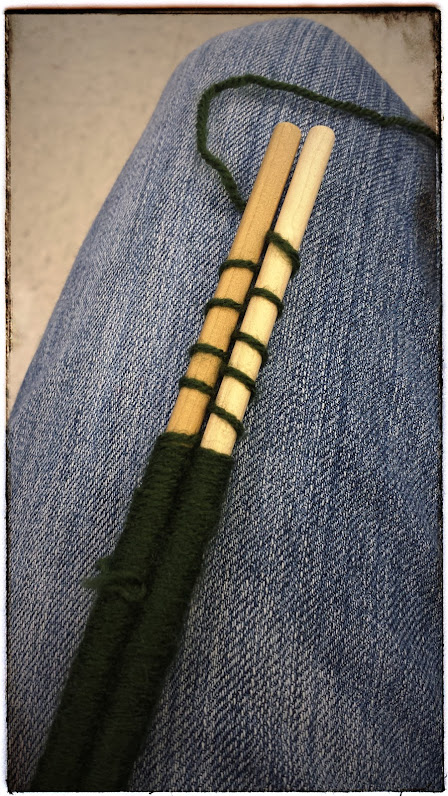
When enough woven yarn is on the sticks, it is pushed down onto the warp yarn. This process can be more difficult than it sounds.  It took a lot of wiggling.  Smoother, polished sticks would be the way to go. This is done over and over until you have the length you want for your project.  Of course, shorter sections can be joined together in a project, as well.

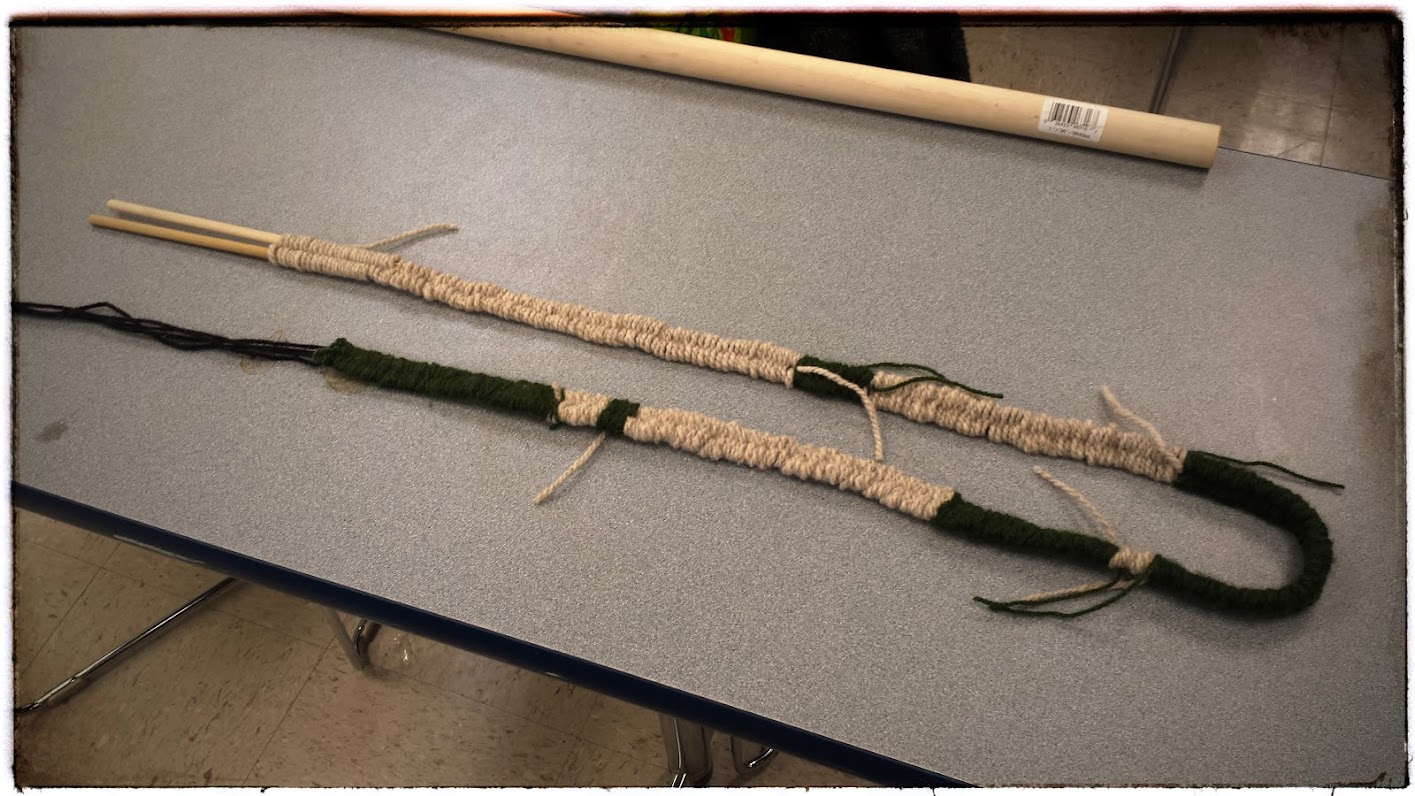
Here you can see the long strand in progress, including the colour changes and unwoven ends.
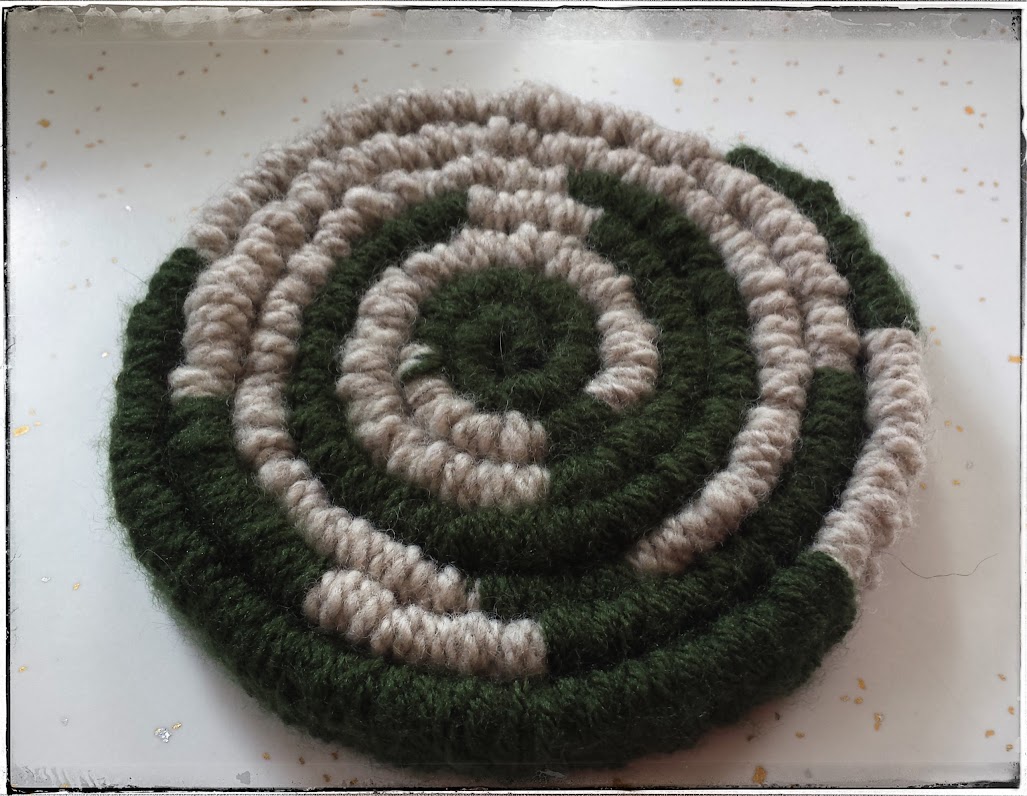
This is what my finished mug rug will look like if and when I get around to whip-stitching it together.  Our teacher recommended doing the whip-stitching on both sides of the piece so that it maintains its shape without splaying out.  It is fairly fugly, but it represents new skills and a lot of fun, so I am happy.  I can see how with a little measuring, the colour changes could be coordinated in cool ways.  Because the strip is stitched together coiled along its flat edge, the finished piece is as thick as the width of the strip.  This makes for very thick, cushy rugs or cushions. I’d also like to try stitching the strips together lengthwise to make a flatter rug.  This could be easily done with wider strips woven on 4 or 5 sticks.
Continuous Strand Weaving

My only experience with weaving is with basket weaving using bark and plant fibers. I’ve never woven on a loom, not even to make a potholder as a child. I am fascinated with woven fabric.  It is beautiful.  Now that Ravelry has added weaving to the mix, I find myself looking at a shawl or scarf wondering what gorgeous stitch pattern was used to create that texture—and discovering it was woven.  Happens all the time.

Continuous strand weaving is interesting in that rather than pre-warping the loom,  it warps and weaves the loom as you go.  It is also interesting in that the weaving process occurs symmetrically from two opposite sides as you go.  I know next to nothing about weaving, and so cannot articulate this in any way other than to say it is magical.  There are many tutorials and videos online if you search “continuous strand weaving” or “triangle weaving”.  It can be done on rectangle and square looms, also. Our class did a travel size triangle and then a travel size square.  Below you can see the triangle loom weaving in progress, with the weaving happening on both sides and working in toward the center.

And then before I took it off the loom.

Here is the finished triangular piece:

And the finished square piece.
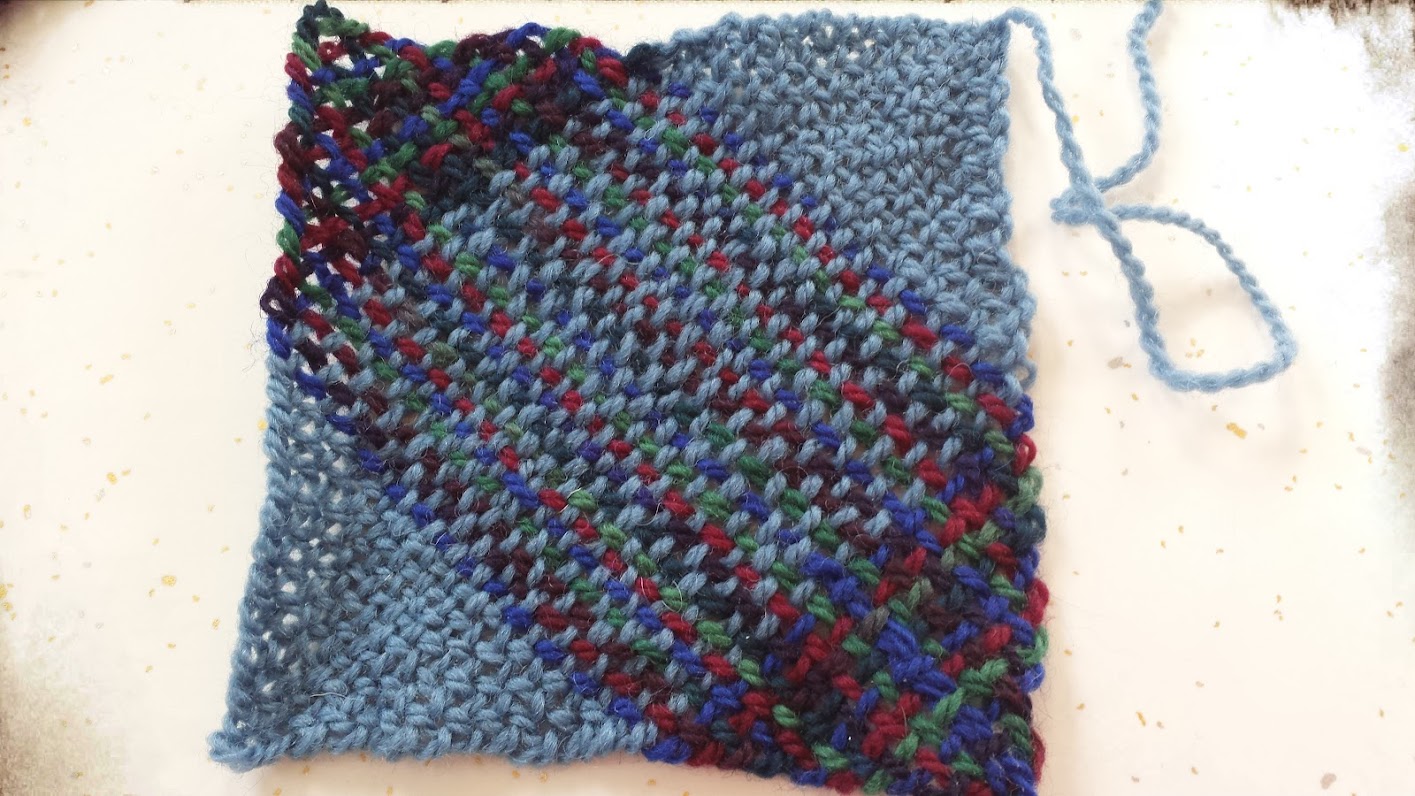
Fact:  My weaving in of ends leaves much to be desired.  And despite triple-checking my work before I took it off the loom, the square piece has a glaring error in it.  Ain’t that the way.  I won’t point it out as I’m sure the weavers out there have already spotted the mistake.  For everyone else, it can be a fun search puzzle.  :P

Weaving FTW!

Wet Felting Boots

Actually, the class was wet felting boots or mittens.  I chose boots, because BOOTS! I enjoyed this class a lot—not only for the fun people, great teacher, and neat new skill, but because wet felting is a very physical craft.  You can’t sit and demurely make wet felted boots—you have to put your whole body into it, and I really liked that.  If you are not familiar with wet felting, it is the process of causing the microscopic scales on wool fibers to lock on to each other through heat and/or agitation, and is often done in conjunction with a healthy squirt of soap.  This interlocking of the fiber’s scales creates a dense woolen fabric called felt.  Wet felting is done with wool roving or batts.  When heat/agitation is applied to already knitted goods, it is called “fulling”, although the two terms are often used interchangeably because the final fabric is still called felt. My good friend Laura over at Mommayaya makes the coolest felted (but actually fulled) slippers, and it was talking to her and watching her work that got me interested in this whole felting/fulling thing and taught me the difference between the two.

The first step to making our boots was creating the resist or form that would give the shape of our boots.  In order to do this, we traced our shoes on a piece of paperboard.  After our shoes were traced, we added an inch all the way around. Since felting shrinks the wool, we had to make our resist bigger than the final size we wanted.  So we traced our left and right foot on the same piece of paperboard.  With me so far?  Because this is where things got funny, and I’ll explain why in a minute. The next step was to join the left and right feet with a “leg”.  Here you can see the resist–two feet and a central “leg”– cut out and ready for wrapping:
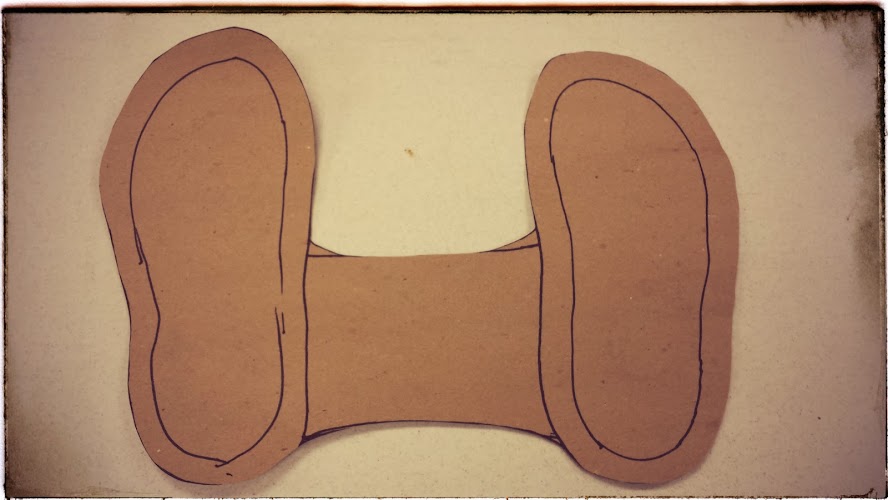
So basically, we would be making both boots at the same time, and the “leg” we drew in the middle would form the ankle part of each boot.  “But wait!” I hear you say.  The foot is drawn flat on one axis, and the leg on another. Yup.  I asked about this, too, because you see, on the day I took this class, I was wearing a pair of crunchy granola Birkenstock foot-shaped shoes.  You can see in the photo above that my shoe has a definite left and right toe rather than the generic roundness or pointiness of most shoes.  And if you’re wondering what the point of that is, we simply have to rotate the picture:
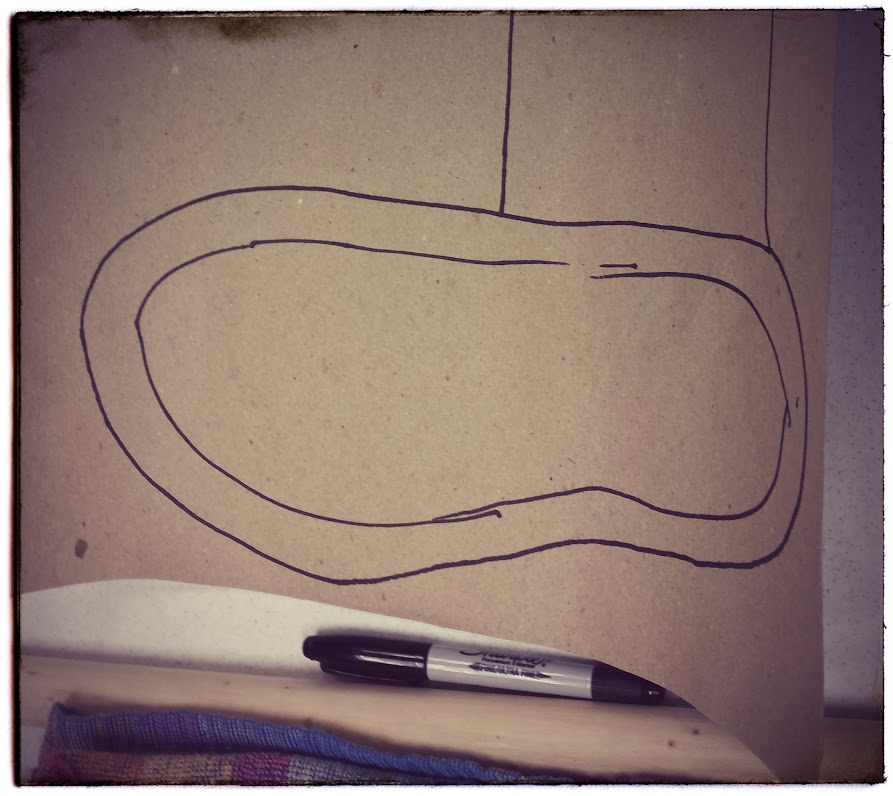
This orientation shows the actual shape that the boot will take when it’s felted.  And because of my funny shoe shape, I highly expected a funny boot shape outcome.  However, my teacher reassured me that it would be fine.  So I went with it.  What the heck, I was having fun.

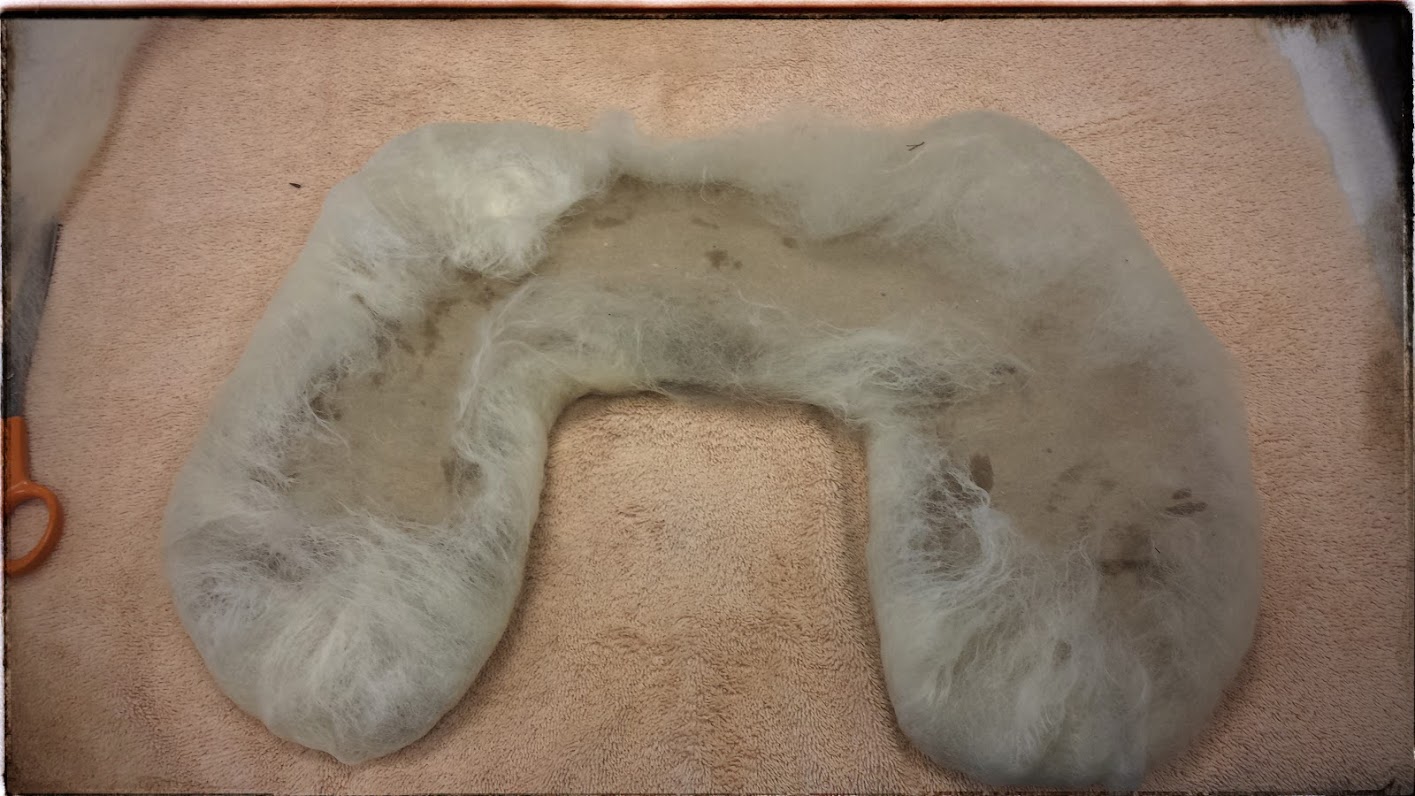
The wool was arranged on the resist in two directions, layer by layer—toe to heel and side to side.  We sprayed the layers down with soapy water as we worked and flipped the piece over to cover each side, wrapping the overlapping edges to secure each side firmly.  Below I’ve completed two layers on the one side of the resist and have flipped it over, wrapped the overlap, and am ready to begin applying the first layer on that side.  The most difficult part of this step was keeping the wool wrapped as tightly around the resist as possible.
After all the layers were done, the piece was ready to felt.  We resprayed the whole thing with soapy water, put a layer of tulle around the piece, and rolled the whole thing up around a 1″ dowel.
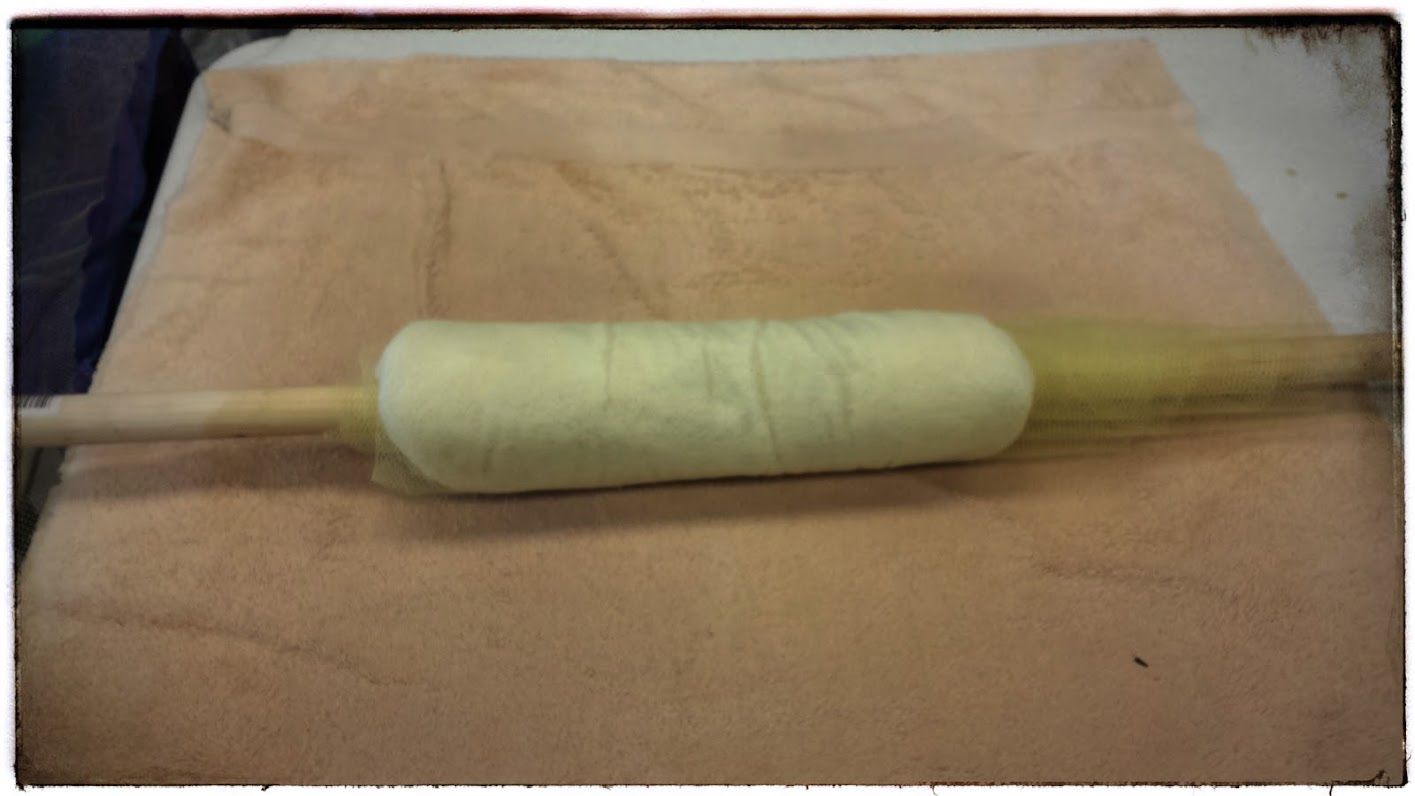
Then the fun began!  Rolling and rolling and rolling and rolling and rolling and rolling, turning, and rolling and rolling and rolling and rolling, flipping, and rolling and rolling and rolling.  We rolled, flipped, rolled, turned, and rolled for AGES.  And then magically…

There was felt.

A  little more rolling and soapy water for good measure, and then, with a few snips, there were boots.
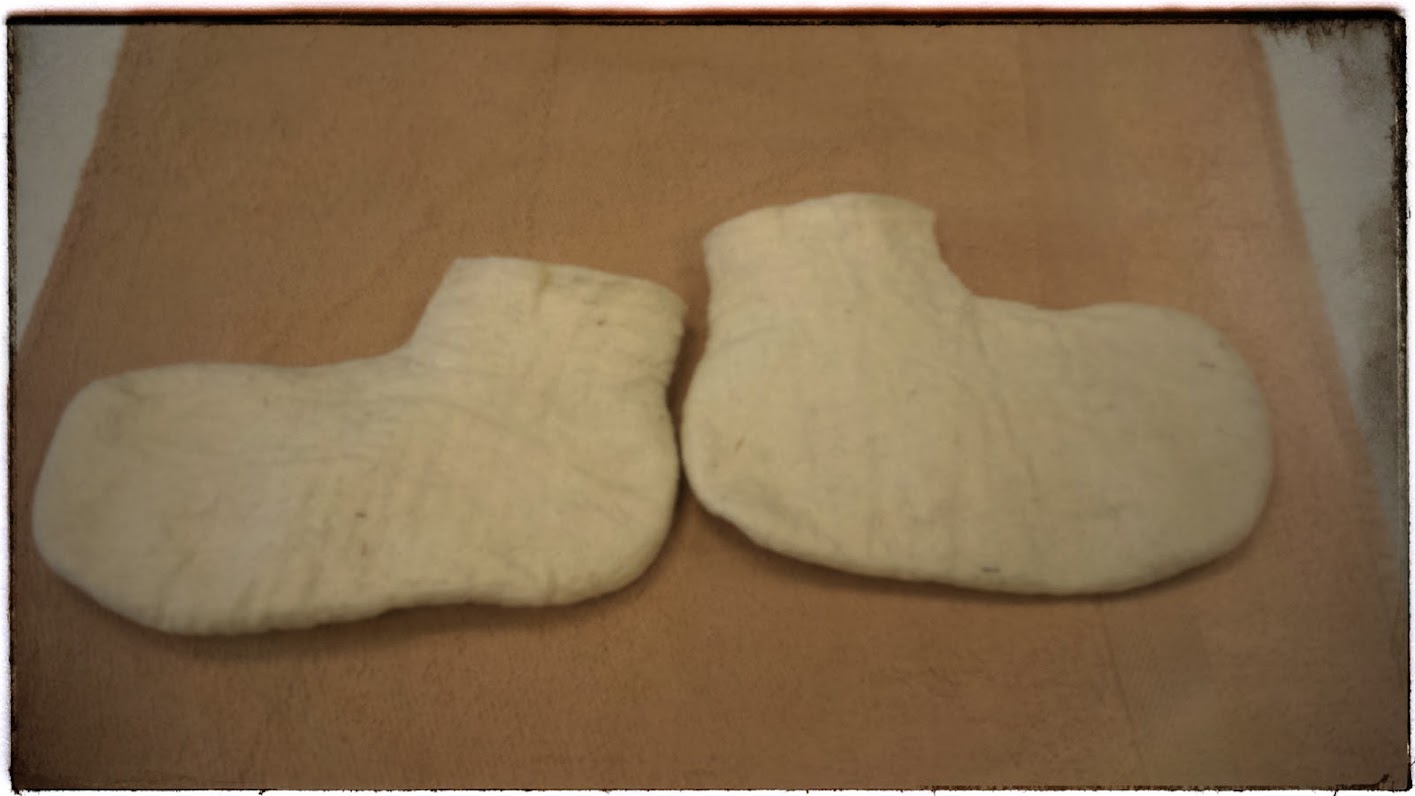
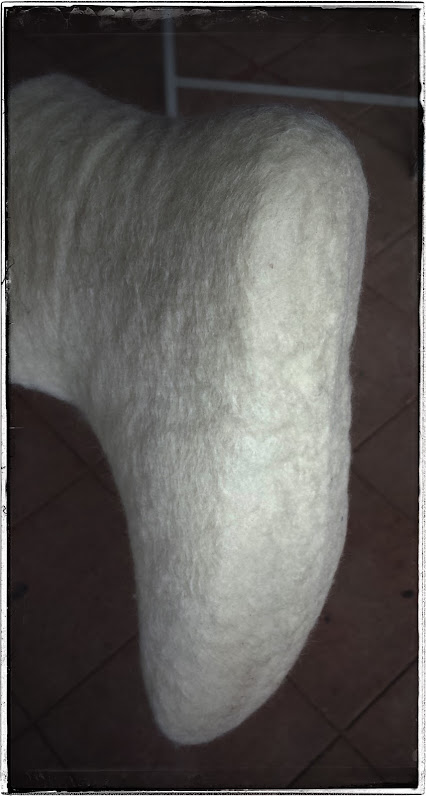
You can already see that my boots had a little more going on up in the toe region than they should have.  After the resist was removed and the ankle seam snipped (I made mine too narrow to put on without a snip), the final step was to put the boots on and finish the felting.  The last bit of felting is what does the final shrinking and shaping to the foot, and this is done while wearing them.  So, the flat shape becomes a three dimensional shape.  And since mine had Birky toe, they looked pretty funny when I put them on.  In the picture below, you can see all the extra material gathered into a flap.
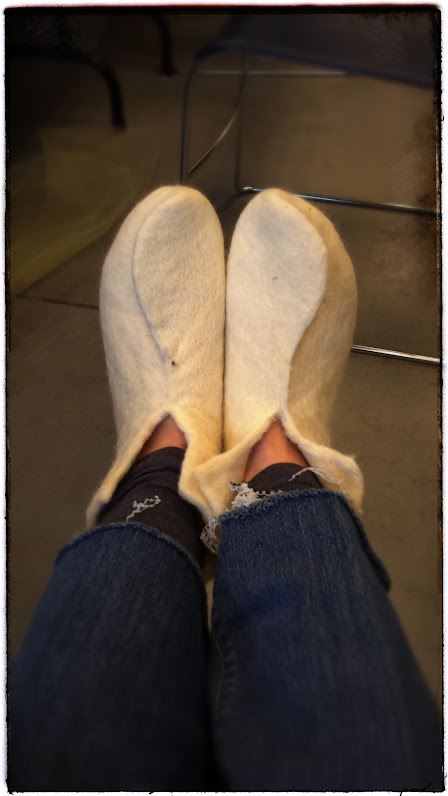
I debated about just cutting it off and seaming up the toe like this, but then while playing around with it, I pulled the flaps over and realized that it was actually a kind of a neat design element.  It was a fun and quirky class, and I made a pair of fun and quirky boots.  They fit, too.
My teacher had a great idea to tack them down with buttons, and so I picked up some cute buttons in the market at the retreat.  I haven’t stitched them on yet—been waiting for the felt to dry—but here’s what it will look like:

I’m tossing around the idea of adding some needle-felted designs to the boots.  E loaned me her needle-felting needles to play with.  I’ve never done that before either. Or I might try my hand at some crewel embroidery.  I’ll show you when I finish them up.

So, a great weekend was had with nice people, great teachers, fun classes, and happy accidents.  All good things.  It was a nice jump start into crafty creativity again after  a year of still hands.  And, the best part is that I learned that there are more of these little (and not so little) local fiber and craft workshops all year long, many of which only charge nominal registration and class fees.  I’m looking forward to more.

Knit|tinK: A Witch’s House Socks

a witch's house socks 1-22-2013 3-42-11 PM

It took me quite a while to figure out what I wanted to knit with all the yarn samples I dyed on Dye Day #1, but it finally came to me in a semi-blinding flash:  house socks. But not just any house socks.  I wanted to knit a pair of house socks like I imagine Tiffany Aching or Nanny Ogg wearing—thick and warm, functional yet quirky.  If you aren’t familiar with Tiffany Aching or Nanny Ogg, they are two characters from one of my favourite series of books ever in the history of the history:  The Wee Free Men, A Hat Full of Sky, Wintersmith, and I Shall Wear Midnight—all by the amazing author Terry Pratchett.  I will not wax on about the books here, but suffice it to say that they have depths, and although I do not call myself “witch”, if I were to be a witch, I’d want to be Tiffany Aching.

So.  Socks.  Here they are.

a witch's house socks 1-22-2013 3-39-28 PMKnit toe-up using my trusty go-to sock knitting formula:  Turkish cast-on, my super-easy-super-rounded toe, Cat Bordhi’s Sweet Tomato Heel, Techknitting’s ribbing transition row, and Elizabeth Zimmermann’s sewn bind off.  I meant to do jogless stripes on these, but I totally forgot.  Lol.

a witch's house socks 1-20-2013 11-03-53 AMI went for a thicker stripe on these—8 rows.  It not only had the look I wanted, but it meant weaving in fewer ends.  I love stripes, but, man, I always forget how much I hate weaving in all those ends.  I call this “stripe amnesia”.  It gets me every time.  48 ends per pair, not including the toe and cuff.  Oy!

a witch's house socks 1-13-2013 1-19-00 AMBut I really like how all of the hand dyed colours went together.  I especially like how much greener the red onion yarn looks next to some of the other colours.  Here’s the line-up:

a witch's house socks 1-22-2013 3-38-015

Starting at the toe—

  1. Birch bark overdyed with yellow onion skins
  2. Osage orange FAIL overdyed with eucalyptus exhaust
  3. Annatto seed
  4. Eucalyptus
  5. Alkanet root
  6. Red onion skins
  7. Safflower exhaust
  8. Yellow onion skins
  9. Red onion skins exhaust
  10. Alkanet root
  11. Walnut creme overdyed with annatto
  12. Birch bark overdyed with yellow onion skins
  13. Eucalyptus
  14. Yellow onion skins
  15. Annatto seed
  16. Red onion skins
  17. Elm bark
  18. Safflower exhaust
  19. Red onion exhaust
  20. Osage orange FAIL overdyed with eucalyptus
  21. Alkanet root
  22. Eucalyptus
  23. Walnut creme overdyed with alkanet
  24. Birch bark overdyed with yellow onion skins
  25. Red onion skins

When I was knitting these, I thought that I would stitch felted soles on so that I could pad around the house without worrying about wearing holes in them.  But when all was said and done, I decided that I’d like to be able to wear them in shoes, too.  So I left the felted soles off for now.  We’ll see if I change my mind.  I loved knitting worsted weight socks.  I love wearing them, too.  Super ridiculously cozy and warm.  Perfect for this cold weather.  Glad I got them done before spring!

Live happy, dye happy!   And knit happy, too!


The Fast and the Fugitive: Pokeberry Edition

It is once again time to play…

IMG_0001

OR

IMG_0002

I sandwiched the samples from each of the original pokeberry dyebaths between heavy cardboard and taped it up against a south-facing window for a month.  All yarn is 100% wool mordanted with vinegar only.  Here are the results:

Pokeberry–First Dyebath

Pokeberry Lightfastness Test Results 11-17-2012 2-25-02 PMPokeberry Lightfastness Test Results 11-17-2012 2-24-25 PM

Pokeberry–Second Dyebath (First exhaust)

Pokeberry Lightfastness Test Results 11-17-2012 2-26-29 PMPokeberry Lightfastness Test Results 11-17-2012 2-26-05 PM

Pokeberry Lightfastness Test Results 11-17-2012 2-27-47 PMPokeberry Lightfastness Test Results 11-17-2012 2-27-35 PM

Pokeberry—Third Dyebath (Second Exhaust):  These are on superwash wool.  Somehow I didn’t test the skein of regular wool from this bath.  Not sure why.

Pokeberry Lightfastness Test Results 11-17-2012 2-29-10 PMPokeberry Lightfastness Test Results 11-17-2012 2-28-43 PM

Pokeberry—Cold Dyebath

Pokeberry Lightfastness Test Results 11-17-2012 2-30-47 PMPokeberry Lightfastness Test Results 11-17-2012 2-30-05 PMSo far, I think everything is as should be expected.  We know that pokeberry is not normally lightfast, but that with proper mordanting and dyeweight ratios, can be made more so.   You can see a substantial difference in the lightfastness between the original dyebath and the two exhaust baths.  Here is the good news.  This lightfastness test was conducted in a room in my house lovingly known as The Snug, short for Snuggery, aka the Sun Room.  It is a very tiny little nook of a room made entirely of mullioned windows.  For the purposes of this post, that means that anything in the room gets not only full south-facing sun, but also east and west sun, as well.  The photos you’ve seen so far are of the side of the yarn which had direct south-facing exposure pressed right up on the glass.  The next series of photos are of the back side of the exposed yarn—the side exposed to normal daily levels of ambient light from the east and west windows.  You can just see the outlines of the direct-exposed areas.  It’s like the yarn has tan lines.  Look at this:

First Dyebath

Pokeberry Lightfastness Test Results 11-17-2012 2-25-17 PM

Second Dyebath (First Exhaust)

Pokeberry Lightfastness Test Results 11-17-2012 2-26-42 PMPokeberry Lightfastness Test Results 11-17-2012 2-28-01 PM

Third Dyebath (Second Exhaust)

Pokeberry Lightfastness Test Results 11-17-2012 2-29-23 PM

Pretty cool, huhn?  The first dyebath had almost no fading on the ambient-exposed side of the yarn.  The exhaust baths had very little.  I think this is a good sign that these pokeberry dyed yarns will stand up to regular wear in normal lighting.  I mean, it’s not like anyone is going to be wearing handknit items when the UV levels are crazy high, so I’m not terribly worried about it.  I’m particularly impressed with the cold dye process.  Not only did it dye awesomely, but it was the most lightfast out of the bunch, too.  The back side of the sample was as purple as the covered section.  It was just hard to get a good picture of it.

Next, I’ve got to get lightfastness tests of the raceme dyelots.  Gotta wait for more sun, though.  Until then,

Live happy, dye happy!

At the Burrow DyeTable # 8: Pokeweed Racemes, Take 3

Here is the third and final installment of this first round of pokeweed raceme dye experiments.  I think the racemes are so beautiful.  I’d say “otherworldly”, but it’s hard to think that of anything born out of Missouri Ozark clay and rock.

Dye Notes:

Dyestuff:  Pokeweed (phytolacca americana)

Parts used:  The racemes (the part that holds the berries)

Source:  My yard, the Haggencrone’s yard, my friend Debbie’s yard, and the Farm

Yarn:  Mountain Meadow Cody, 100% wool.  I mordanted a little differently this time, opting not to follow any instructions other than those given by the seat of my pants.  I decided to use more vinegar, and pretty much did a 1:3 ratio of white distilled vinegar to water.  The reason for this is that in lieu of using straight acetic acid, I’m hoping the higher acid content will help with the fastness of this dye.  So I soaked 100g of wool yarn in a pot of 1/4 vinegar to 3/4 water.  I heated the pot to 190F and held it there for an hour.  Then I let the yarn sit and cool in the mordant bath overnight.  The starting pH at room temperature was 3.1.  At 188.2F, it was 3.0.

Ratio of dyestuff to fiber:  I only used half of the yarn I mordanted for this particular dyebath, so 50g total.  I’m not sure of the exact amount of racemes.  I didn’t weigh them out, as this was done on a whim.  But I can tell you that when I pulled them all from the bucket, they easily weighed a pound.   I’m sure most of that was the vinegar that they absorbed., so I’m going to say maybe 100g starting weight, and next time I promise to weigh them out.

Extraction:   Chucked the racemes into a bucket and covered them in white distilled vinegar.  Put a plate on top to hold them down.  Left them on their own for a couple months.   As you can see, these didn’t leach out the way the other ones did.  I think had I put much more vinegar in, they would have.  They were pretty compacted in this bucket.

Dyebath:  After the recent success with the cold pokeberry dyebath, I knew that I had to try a cold raceme dyebath, too.  I strained out the racemes through a colander and reserved half of the liquid for the cold dyejar (the other half was used for the hot dyebath).  I added the premordanted yarn and brought the dyejar inside the house, because I was afraid it might freeze and crack if left outside.  I kept it covered with black cloth (actually, just a black shirt—sorry if that is less poetic) to block out the sunlight.  The yarn sat undisturbed for 9 days.

The results?

WOOT!!!  Slam dunk and SCORE!  Cold dyeing with poke is the way to go.

Here is a picture of all 3 pokeweed raceme experiments together:

Fascinating, don’t you think?  That such totally different colours could come from the same plant, the same part of that plant, on the same yarn, and with the same mordant—just because of a difference in the specific dyebath process.  Very cool.  So does anyone want to hazard a guess as to why the cold process put the red on the wool when the heated baths didn’t?  Next I’ll put samples from these 3 up for a lightfastness test.  Will be interesting.  Here’s to curiousity and experimentation!

Live happy, dye happy!

At the Burrow DyeTable # 8: Pokeweed Racemes, Take 2

You have seen the results of the first pokeweed raceme experiment, but that is not all that has been cooking!  Unbeknowst to you, I have been extracting a second bucket of pokeweed racemes!   :D  How cool is that?  Mas racemes.  Pretty fun.

Dye Notes:

Dyestuff:  Pokeweed (phytolacca americana)

Parts used:  The racemes (the part that holds the berries)

Source:  My yard, the Haggencrone’s yard, my friend Debbie’s yard, and the Farm

Yarn:  Mountain Meadows Cody, 100% wool.  I mordanted a little differently this time, opting not to follow any instructions other than those given by the seat of my pants.  I decided to use more vinegar than used in the vinegar mordant for the pokeberry dyebaths, and pretty much did a 1:3 ratio of white distilled vinegar to water.  The reason for this is that in lieu of using straight acetic acid, I’m hoping the higher acid content will help with the fastness of this dye.  So I soaked 100g of wool yarn in a pot of 1/4 vinegar to 3/4 water.  I heated the pot to 190F and held it there for an hour.  Then I let the yarn sit and cool in the mordant bath overnight.  The starting pH at room temperature was 3.1.  At 188.2F, it was 3.0.

Ratio of dyestuff to fiber:  I only used half of the yarn I mordanted for this particular dyebath, so 50g total.  I’m not sure of the exact amount of racemes.  I didn’t weigh them out, as this was done on a whim.  But I can tell you that when I pulled them all from the bucket, they easily weighed a pound.  But I’m sure most of that was the vinegar that they absorbed.  I’m going to say maybe 100g starting weight, and next time I promise to weigh them out.

Extraction:   Chucked the racemes into a bucket and covered them in white distilled vinegar.  Put a plate on top to hold them down.  Left them for a couple months.   As you can see, these didn’t leach out the way the other ones did.  I think that had I put more vinegar in, they would have.  They were pretty compacted in this bucket.

Dyebath:  I strained out the racemes and reserved the dye liquor, pouring it into the dyepot.  To this I added the remains of the mordanting bath.  The starting pH of the dyebath was 3.5.  I gently raised the temperature to a window between 175-195F.  At temperature, the pH was 3.2.  I held the bath in this temperature window for 2 hours and then let the yarn cool in the pot overnight.

The results?

Again, unexpected.  This time we had a much higher dyestuff to fiber ratio, but we still didn’t get the red that they dyebath seemed to promise.  Why?  I’m not sure.  I think it could be one of several things.  1)  Perhaps although the bath looks red, there really isn’t enough of that compound in it to dye the yarn?  2)  Although the dyebath never boiled, perhaps it would have preferred to stay under 190F?  Even the next morning, when I took the yarn out, the bath was still full of colour.  It just wasn’t on the yarn.  Will have to play with this more…  Anyway, I think it’s a lovely soft yellow ochre, and I’m sure I’ll find something nice to knit with it.

Here you can see it next to the all-in-one raceme skein from the day before.  I am surprised that the slight difference in dye methods yielded such different tones.  Or was it something inherent in that first batch of racemes collected earlier?  Could it be due to the complete leaching of those first racemes?  I’m not sure.  Two nice colours, I think, though.  I’m eager to see how their lightfastness test turns out…

Live happy, dye happy!

At the Burrow DyeTable # 8: Pokeweed Racemes, Take 1

When I first started gathering the berries of the phytolacca americana, aka the glorious pokeweed plant, I threw the racemes into the compost heap after carefully removing all the precious berries.  Everyone says to just dye with the berries.  But I do so love to figure things out for myself, and besides, just because someone said so isn’t a great reason for doing anything, is it?  So when my curiousity got the better of me (although arguably, it makes me better, so I’ll keep it),  I decided to see if I could extract any colour from the racemes themselves.

Dye Notes:

Dyestuff:  Pokeweed, phytolacca americana

Parts used:  The racemes (the part that holds the berries)

Source:  My yard, the Haggencrone’s yard, my friend Debbie’s yard, and the Farm

Yarn:  Mountain Meadows Cody mordanted in vinegar.  I did the mordanting a little differently this time.  I basically mordanted in straight vinegar as part of an all-in-one dyepot.

Ratio of dyestuff to fiber:  To be honest, I have no idea how many grams of racemes I had here.  I’d guess maybe 40g or so.  The hank of wool was 50g.  So, I probably did not get a 1:1 ratio.  But I really wanted to dye the whole hank.  It’s hard sometimes to figure out what to do with all those mini-skeins.  There’s only so much end weaving I can handle, lol.

Extraction:  For this first batch, I put the racemes in pure distilled white vinegar to cover and left them for about 3 weeks.

To my surprise, when I took the racemes out to strain off the liquid (and mostly just to see what was going on in there) I found this:

All of the colour had been leached out of the racemes and magically put into the vinegar.  Pretty damn cool.  Presto change-oh!  And all the colour is in the liquid.

Dyebath:  I decided to do this dyebath as an all-in-one, meaning mordanting and dyeing all in one go.  Why not?  After all, it just requires a vinegar mordant, and the dye liquor is all vinegar… just seemed to make sense.  I didn’t want to have to add any more liquid to the pot, opting to leave it just the vinegar dye extraction.  There was just enough room for the yarn to float around, and since the racemes were totally bleached out already, I did not bother doing a heated extraction with them.  The starting pH of the dyebath was 3.4.

I slowly and gently heated it up to a temperature window of 175-190F.  At a temperature of 188.9F, the pH was 3.1.

I kept the dyebath in this temperature window for an hour, turned off the heat, and let the yarn sleep overnight in the pot.

The results?

Not what I expected at all.  Did you see how red that dyebath was?  And yet the yarn came out this lovely soft peach colour.  It’s ok.  I’m sure I’ll find something peachy to knit with this.  :D  Lesson learned?  Waste not, want not.   Not every dyestuff makes a colour that you’d want to repeat, but to me part of the fun of this great dyeing adventure is exploring all the variables, going down all the roads.  It’s not just about the end result.  Yes, a beautiful skein of yarn is a sweet, sweet bonus, but if that’s all I wanted, I could go buy that at any yarn shop.  That’s not why I’m here, though.  So, I’ll keep my dyestuffs extracting and keep my pots simmering and maybe one day I’ll figure this dyeing thing out.  I’m going to have a lot of fun trying.

Live happy, dye happy!

Post Navigation